
Introduction: Your Roadmap to Successful Integration
Setting up NetSuite WooCommerce integration might seem daunting, but with proper planning and a systematic approach, you can successfully implement a robust integration that transforms your business operations. This comprehensive step-by-step guide will walk you through the entire process, from initial planning to go-live and beyond.
Whether you’re implementing the integration yourself or working with a consultant, understanding the complete process ensures a smooth implementation, minimizes disruptions, and helps you achieve the full benefits of NetSuite WooCommerce integration.
Pre-Implementation Planning (Weeks 1-2)
Step 1: Define Your Integration Requirements
Document Your Current Processes
Before making any changes, document how your business currently operates:
- Order Flow: How do orders move from WooCommerce to fulfillment?
- Inventory Management: How do you track and update inventory?
- Customer Management: How is customer data handled?
- Product Management: How do you maintain product information?
- Financial Processes: How are transactions recorded in accounting?
- Fulfillment Workflow: How does your warehouse process orders?
Identify Pain Points and Goals
List what you want to improve:
- Manual processes that waste time
- Error-prone workflows
- Inventory accuracy issues
- Order fulfillment delays
- Financial reporting challenges
- Customer service bottlenecks
Define Integration Scope
Decide what data will be integrated:
- Phase 1 (Essential):
- Orders (WooCommerce to NetSuite)
- Inventory (NetSuite to WooCommerce)
- Order status updates (NetSuite to WooCommerce)
- Phase 2 (Important):
- Customers
- Products and pricing
- Fulfillment and tracking
- Phase 3 (Advanced):
- Financial integration
- Custom fields and metadata
- Advanced workflows and automations
Step 2: Choose Your Integration Platform
Evaluate Options Based On
- Order Volume: Current and projected monthly orders
- Budget: Implementation costs plus ongoing subscription
- Complexity: Standard vs. custom requirements
- Technical Resources: In-house technical capabilities
- Timeline: How quickly you need to go live
- Support Needs: Level of vendor support required
Request Demos and Proposals
- Schedule demos with 2-3 vendors
- Request detailed proposals with pricing
- Ask for customer references
- Verify technical capabilities match your needs
- Understand implementation timeline estimates
Step 3: Assemble Your Project Team
Internal Team Members
- Project Manager: Coordinates implementation, owns timeline
- NetSuite Administrator: Configures NetSuite settings
- WooCommerce Administrator: Configures WooCommerce settings
- Operations Representative: Represents warehouse/fulfillment needs
- Finance Representative: Ensures accounting requirements are met
- Customer Service Representative: Provides end-user perspective
- IT/Technical Lead: Handles technical configuration and troubleshooting
External Resources
- Integration Platform Vendor: Implementation consultant
- NetSuite Consultant: (if needed) NetSuite configuration expert
- WooCommerce Developer: (if needed) For custom WooCommerce modifications
Step 4: Create Implementation Plan
Define Project Timeline
Typical timeline for standard implementation:
- Week 1-2: Planning and requirements
- Week 3-4: System configuration
- Week 5-6: Testing and refinement
- Week 7: User training
- Week 8: Go-live and support
Set Milestones and Deliverables
- Requirements documentation complete
- NetSuite configuration complete
- WooCommerce configuration complete
- Integration platform configured
- Testing phase complete
- Training complete
- Go-live achieved
NetSuite Configuration (Weeks 3-4)
Step 5: Prepare Your NetSuite Environment
Enable Required Features
- Navigate to Setup > Company > Enable Features
- Under SuiteCloud tab:
- Check “Web Services”
- Check “REST Web Services”
- Check “SOAP Web Services”
- Under Transactions tab:
- Verify “Sales Orders” is enabled
- Enable “Advanced Shipping” if using shipping integration
- Under Items & Inventory tab:
- Verify “Inventory” is enabled
- Enable “Multi-Location Inventory” if using multiple warehouses
- Enable “Lot Numbered Inventory” if needed
- Enable “Serial Numbered Inventory” if needed
- Click Save
Configure Company Preferences
- Go to Setup > Company > General Preferences
- Under Transactions tab:
- Set order number prefix for WooCommerce orders (e.g., “WC-“)
- Configure approval workflow if required
- Under Accounting tab:
- Verify accounting preferences align with your needs
- Set revenue recognition preferences
- Click Save
Step 6: Create Integration User and Role
Create Custom Role for Integration
- Navigate to Setup > Users/Roles > Manage Roles
- Click New
- Name: “WooCommerce Integration”
- Configure permissions:
- Transactions:
- Sales Orders: Full
- Item Fulfillments: Full
- Cash Sales: Full (if using)
- Invoices: Full
- Lists:
- Customers: Full
- Items: Full
- Price Levels: View
- Customer Categories: View
- Setup:
- Web Services Preferences: Full
- Reports:
- Inventory Reports: Full
- Sales Reports: Full
- Transactions:
- Click Save
Create Integration User
- Go to Setup > Users/Roles > Manage Users
- Click New
- Enter details:
- Name: WooCommerce Integration
- Email: [email protected]
- Role: WooCommerce Integration (role created above)
- Access: Give Access
- Under Access tab:
- Check “Web Services Only Login”
- Set strong password
- Click Save
Step 7: Generate NetSuite API Credentials
Create Integration Record
- Navigate to Setup > Integration > Manage Integrations
- Click New
- Enter details:
- Name: “WooCommerce Integration”
- State: Enabled
- Check “Token-Based Authentication”
- Check “TBA: Authorization Flow”
- Click Save
- Copy and securely store:
- Consumer Key
- Consumer Secret
Generate Access Token
- Navigate to Setup > Users/Roles > Access Tokens
- Click New
- Select:
- Application Name: WooCommerce Integration
- User: Integration user created earlier
- Role: WooCommerce Integration
- Click Save
- Copy and securely store:
- Token ID
- Token Secret
Step 8: Configure NetSuite Data
Set Up Item/Product Structure
- Ensure all products have unique SKUs matching WooCommerce
- Configure item types appropriately (Inventory, Non-Inventory, Service, etc.)
- Set up item categories and classifications
- Configure pricing and costing methods
- Set reorder points for automated replenishment
Configure Locations
- Go to Setup > Company > Locations
- Create/verify warehouse locations
- Assign inventory to appropriate locations
- Set default fulfillment location
Set Up Customer Categories
- Create “WooCommerce Customer” category
- Set default terms and pricing for online customers
- Configure customer naming convention
Create Custom Fields (if needed)
- Navigate to Customization > Lists, Records, & Fields > Entity Fields
- Create custom fields for integration:
- WooCommerce Customer ID
- WooCommerce Order Number
- Payment Gateway Transaction ID
- Shipping Method Code
- Any other custom data you need to track
WooCommerce Configuration (Week 3-4)
Step 9: Prepare Your WooCommerce Store
Update WooCommerce Settings
- Navigate to WooCommerce > Settings
- Under General tab:
- Verify store location and currency
- Set up selling locations
- Under Products > Inventory tab:
- Enable “Manage Stock” at product level
- Set “Hold Stock” duration (recommend 60 minutes)
- Configure “Low Stock Threshold”
- Set “Out of Stock Threshold” (typically 0)
- Choose “Out of Stock Visibility” preference
- Enable “Stock Display Format” as needed
- Click Save changes
Ensure Product Data Consistency
- Verify all products have SKUs matching NetSuite items
- Ensure SKUs are unique (no duplicates)
- Review product variations and ensure proper SKU assignment
- Clean up any orphaned or draft products
- Standardize product attributes and categories
Step 10: Generate WooCommerce API Keys
- Navigate to WooCommerce > Settings > Advanced > REST API
- Click Add Key
- Configure API key:
- Description: “NetSuite Integration”
- User: Select administrator user
- Permissions: Read/Write
- Click Generate API Key
- Copy and securely store:
- Consumer Key
- Consumer Secret
- Important: This is the only time you’ll see the secret. Store it securely!
Step 11: Configure WooCommerce Webhooks (Optional for Real-Time Sync)
- Navigate to WooCommerce > Settings > Advanced > Webhooks
- Click Add Webhook
- Configure webhook for orders:
- Name: “NetSuite Order Sync”
- Status: Active
- Topic: Order created
- Delivery URL: [Provided by integration platform]
- Secret: [Generate strong secret]
- API Version: Latest version
- Click Save Webhook
- Repeat for other events if needed (order updated, order deleted, etc.)
Integration Platform Configuration (Week 4-5)
Step 12: Set Up Integration Platform Account
Create Account and Install Connectors
- Sign up for your chosen integration platform
- Install NetSuite connector/bundle if required
- Install WooCommerce connector if available
- Complete initial platform setup and configuration
Step 13: Connect NetSuite to Integration Platform
- In integration platform, add new NetSuite connection
- Enter NetSuite credentials:
- Account ID (found in NetSuite at Setup > Company > Company Information)
- Consumer Key and Secret (from Step 7)
- Token ID and Secret (from Step 7)
- Test connection to verify authentication
- Configure connection settings (timeouts, retry logic, etc.)
- Save connection
Step 14: Connect WooCommerce to Integration Platform
- In integration platform, add new WooCommerce connection
- Enter WooCommerce details:
- Store URL (e.g., https://yourstore.com)
- Consumer Key (from Step 10)
- Consumer Secret (from Step 10)
- Test connection to verify authentication
- Configure connection settings
- Save connection
Step 15: Configure Order Flow (WooCommerce to NetSuite)
Create Order Import Flow
- Create new integration flow: “WooCommerce Orders to NetSuite”
- Configure source (WooCommerce):
- Object: Orders
- Trigger: Webhook (real-time) or Polling (scheduled)
- Filters: New orders with status “Processing”
- Configure destination (NetSuite):
- Object: Sales Orders
- Action: Create
Map Order Fields
Configure field mappings between WooCommerce and NetSuite:
| WooCommerce Field | NetSuite Field | Transformation |
|---|---|---|
| order_number | PO Number or Custom Field | Prefix with “WC-“ |
| billing.first_name + last_name | Customer Name | Concatenate |
| billing.email | Customer Email | Direct |
| billing.address_1 | Billing Address Line 1 | Direct |
| shipping.address_1 | Shipping Address Line 1 | Direct |
| line_items[].sku | Item Internal ID | Lookup by SKU |
| line_items[].quantity | Quantity | Direct |
| line_items[].price | Rate | Direct |
| total_tax | Tax Amount | Direct |
| shipping_total | Shipping Cost | Direct |
| total | Total | Validation |
Configure Business Rules
- Customer Lookup: Search for existing customer by email, create if not found
- Item Lookup: Match items by SKU to NetSuite internal ID
- Location Assignment: Assign orders to default location or use routing rules
- Order Status: Set initial order status (e.g., “Pending Fulfillment”)
- Tax Handling: Map WooCommerce tax to NetSuite tax codes
- Shipping Method: Map WooCommerce shipping to NetSuite shipping methods
- Payment Method: Record payment method from WooCommerce
Configure Error Handling
- Set retry attempts (recommend 3-5)
- Configure exponential backoff timing
- Define error notification recipients
- Set up error queue for manual resolution
- Configure validation rules to catch errors early
Step 16: Configure Inventory Sync (NetSuite to WooCommerce)
Create Inventory Sync Flow
- Create new integration flow: “NetSuite Inventory to WooCommerce”
- Configure source (NetSuite):
- Object: Inventory Items
- Trigger: Scheduled (e.g., every 5-15 minutes) or Real-time (if supported)
- Data: Item Internal ID, SKU, Available Quantity
- Configure destination (WooCommerce):
- Object: Products
- Action: Update
- Field: Stock Quantity
Configure Inventory Calculation
Define how available inventory is calculated:
- Simple Available: NetSuite Available = WooCommerce Stock
- With Safety Buffer: Available – Buffer Amount = WooCommerce Stock
- Multi-Location: Sum of Available across locations = WooCommerce Stock
- Reserved Inventory: Available – Committed – Reserved = WooCommerce Stock
Set Inventory Rules
- Minimum display quantity (never show less than X)
- Maximum display quantity (cap at X, show “10+ available”)
- Zero stock handling (Out of Stock vs. Backorder)
- Negative inventory handling (how to treat negative NetSuite inventory)
- Item filtering (which items to sync)
Step 17: Configure Fulfillment Sync (NetSuite to WooCommerce)
Create Fulfillment Update Flow
- Create new flow: “NetSuite Fulfillments to WooCommerce”
- Configure source (NetSuite):
- Object: Item Fulfillments
- Trigger: Real-time (webhook) or Scheduled
- Data: Order ID, Tracking Number, Carrier, Ship Date
- Configure destination (WooCommerce):
- Object: Orders
- Action: Update
- Status: Completed
- Add tracking information
Map Fulfillment Fields
- NetSuite Order ID → WooCommerce Order ID (lookup)
- NetSuite Tracking Number → WooCommerce Tracking Number
- NetSuite Carrier → WooCommerce Shipping Provider
- NetSuite Ship Date → WooCommerce Completed Date
Testing Phase (Week 5-6)
Step 18: Conduct Unit Testing
Test Order Flow
- Create Test Order in WooCommerce:
- Use test product with known inventory
- Place order with test customer data
- Use test payment method
- Verify in NetSuite:
- Sales Order created with correct details
- Customer created or matched correctly
- All line items present with correct quantities and prices
- Addresses populated correctly
- Tax calculated correctly
- Payment information recorded
- Check Integration Logs:
- Sync completed successfully
- No errors or warnings
- Timing acceptable (within expected latency)
Test Inventory Sync
- Adjust Inventory in NetSuite:
- Increase quantity of test product
- Wait for sync cycle
- Verify in WooCommerce:
- Product stock quantity updated correctly
- Update time acceptable
- Test Zero Stock:
- Set NetSuite inventory to 0
- Verify WooCommerce shows “Out of Stock”
- Test Negative Stock:
- Create negative inventory scenario
- Verify proper handling per your business rules
Test Fulfillment Sync
- Fulfill Order in NetSuite:
- Create Item Fulfillment for test order
- Add tracking number
- Select carrier
- Mark as shipped
- Verify in WooCommerce:
- Order status updated to “Completed”
- Tracking information populated
- Customer notification email sent (if configured)
Step 19: Conduct Integration Testing
Test Complete Order Lifecycle
- Place order in WooCommerce
- Verify order appears in NetSuite
- Fulfill order in NetSuite
- Verify fulfillment updates WooCommerce
- Check inventory decremented correctly
- Verify all notifications sent properly
Test Different Order Scenarios
- Guest Checkout: Customer without account
- Registered Customer: Existing customer account
- Multiple Items: Order with several different products
- Product Variations: Variable products with different SKUs
- Discounts/Coupons: Orders with promotional codes
- Shipping Methods: Different shipping options
- Payment Methods: Various payment gateways
- International Orders: Orders from different countries
- Tax Scenarios: Different tax jurisdictions
Test Error Scenarios
- Order with invalid SKU (product not in NetSuite)
- Order with missing required data
- Duplicate order (same order syncing twice)
- Network interruption during sync
- API rate limiting
- Invalid address format
Step 20: Conduct Performance Testing
Test Volume Handling
- Create multiple orders rapidly (simulate flash sale)
- Verify all orders sync correctly
- Measure sync latency under load
- Check for queue backups
- Monitor API usage
Test Sync Timing
- Measure order sync latency (WooCommerce to NetSuite)
- Measure inventory sync latency (NetSuite to WooCommerce)
- Measure fulfillment sync latency (NetSuite to WooCommerce)
- Verify timing meets business requirements
Step 21: User Acceptance Testing (UAT)
Involve Actual Users
- Operations Team: Process test orders through complete workflow
- Customer Service: Look up orders and customer information
- Warehouse: Verify pick lists and fulfillment process
- Finance: Verify financial data and reporting
- Management: Review dashboards and reports
Collect Feedback
- Document any issues or concerns
- Identify process improvements
- Note any additional training needs
- Capture feature requests for Phase 2
Training and Documentation (Week 7)
Step 22: Train Your Team
Create Training Materials
- Overview Presentation: How the integration works
- Role-Specific Guides: Procedures for each team
- Quick Reference Cards: Common tasks and troubleshooting
- Video Tutorials: Screen recordings of key processes
- FAQ Document: Answers to common questions
Conduct Training Sessions
- Operations Team:
- How orders flow from WooCommerce to NetSuite
- How to handle order exceptions
- Fulfillment process changes
- How to check sync status
- Customer Service:
- How to look up orders in NetSuite
- How to check order status
- How to process returns
- Where to find customer information
- Finance Team:
- How transactions flow to accounting
- New financial reports available
- Reconciliation procedures
- Month-end close process changes
- Administrators:
- How to monitor integration health
- How to troubleshoot issues
- How to configure settings
- Who to contact for support
Step 23: Create Documentation
System Documentation
- Integration architecture diagram
- Field mapping specifications
- Business rules and logic
- API credentials and connection details (securely stored)
- Configuration settings for all systems
- Custom field definitions
Process Documentation
- Order processing workflow
- Inventory management procedures
- Fulfillment process
- Returns handling
- Exception handling procedures
- Escalation procedures
Troubleshooting Guide
- Common issues and solutions
- How to check integration logs
- How to manually retry failed syncs
- Who to contact for different issues
- Vendor support contact information
Go-Live (Week 8)
Step 24: Pre-Launch Preparation
Final Checks
- ✓ All testing complete and issues resolved
- ✓ Team training complete
- ✓ Documentation complete and distributed
- ✓ Backup of WooCommerce database taken
- ✓ Backup of NetSuite data exported
- ✓ Support contact information distributed
- ✓ Rollback plan documented
- ✓ Go-live scheduled during low-traffic period
Communication Plan
- Notify team of go-live date and time
- Communicate any expected downtime (if applicable)
- Set expectations for monitoring period
- Establish communication channels for issues
Step 25: Execute Go-Live
Go-Live Checklist
- Perform Initial Data Sync:
- Run full inventory sync from NetSuite to WooCommerce
- Verify all product quantities correct
- Sync existing customers if needed
- Enable Integration:
- Activate order sync flow
- Enable inventory sync schedule
- Activate fulfillment sync flow
- Enable webhooks (if using real-time sync)
- Monitor First Transactions:
- Watch first orders sync in real-time
- Verify data accuracy
- Check for any errors
- Measure sync timing
- Verify Website Function:
- Place test order on live site
- Verify checkout works correctly
- Check inventory displays properly
- Confirm customer experience unchanged
Step 26: Post-Launch Monitoring
First 24 Hours
- Monitor integration dashboard continuously
- Check error logs every hour
- Verify orders syncing correctly
- Respond immediately to any issues
- Keep team on standby for questions
First Week
- Daily review of integration health
- Monitor sync success rates
- Track and resolve any errors
- Gather feedback from team
- Document any issues and resolutions
- Fine-tune settings based on observed behavior
First Month
- Weekly review of integration performance
- Analyze sync metrics and trends
- Identify optimization opportunities
- Schedule follow-up training if needed
- Begin planning Phase 2 features
Ongoing Maintenance and Optimization
Step 27: Establish Monitoring Routine
Daily Monitoring
- Check integration dashboard for errors
- Review failed sync queue
- Verify critical orders synced correctly
- Monitor API usage against limits
Weekly Tasks
- Run reconciliation report (WooCommerce orders vs. NetSuite sales orders)
- Review inventory accuracy
- Analyze sync performance trends
- Review and resolve pending errors
- Check for system updates from vendors
Monthly Tasks
- Full audit of integration health
- Review and optimize configuration
- Update documentation for any changes
- Analyze business impact and ROI
- Plan improvements and enhancements
Step 28: Continuous Improvement
Gather Feedback
- Regular check-ins with team members
- Collect ideas for improvements
- Identify remaining pain points
- Prioritize enhancement requests
Optimize Performance
- Fine-tune sync schedules
- Optimize field mappings
- Refine business rules
- Improve error handling
- Enhance monitoring and alerts
Plan Phase 2
- Implement additional features
- Add more complex workflows
- Integrate additional systems
- Enhance reporting and analytics
- Automate more processes
Troubleshooting Common Setup Issues
Authentication Failures
Symptoms: Cannot connect to NetSuite or WooCommerce
Solutions:
- Verify API credentials are correct
- Check that Web Services are enabled in NetSuite
- Confirm integration user has proper permissions
- Verify WooCommerce REST API is enabled
- Check for IP restrictions or firewall blocks
Orders Not Syncing
Symptoms: Orders placed in WooCommerce don’t appear in NetSuite
Solutions:
- Verify integration flow is active
- Check webhook configuration and delivery
- Review error logs for specific failures
- Verify order meets filter criteria
- Check for SKU mismatches
- Confirm customer can be created or matched
Inventory Not Updating
Symptoms: Inventory changes in NetSuite don’t reflect in WooCommerce
Solutions:
- Verify inventory sync schedule is active
- Check for errors in sync logs
- Verify SKU matching is working
- Clear WooCommerce cache
- Check inventory calculation rules
- Verify products are enabled for sync
Conclusion
Successfully setting up NetSuite WooCommerce integration requires careful planning, systematic execution, and attention to detail. By following this step-by-step guide, you can implement a robust integration that transforms your business operations and delivers significant value.
Remember that integration is not a one-time project but an ongoing process of optimization and improvement. Continue monitoring performance, gathering feedback, and refining your configuration to maximize the benefits of your integrated systems.
With proper setup and maintenance, NetSuite WooCommerce integration will serve as a foundation for efficient, scalable operations that support your business growth for years to come.
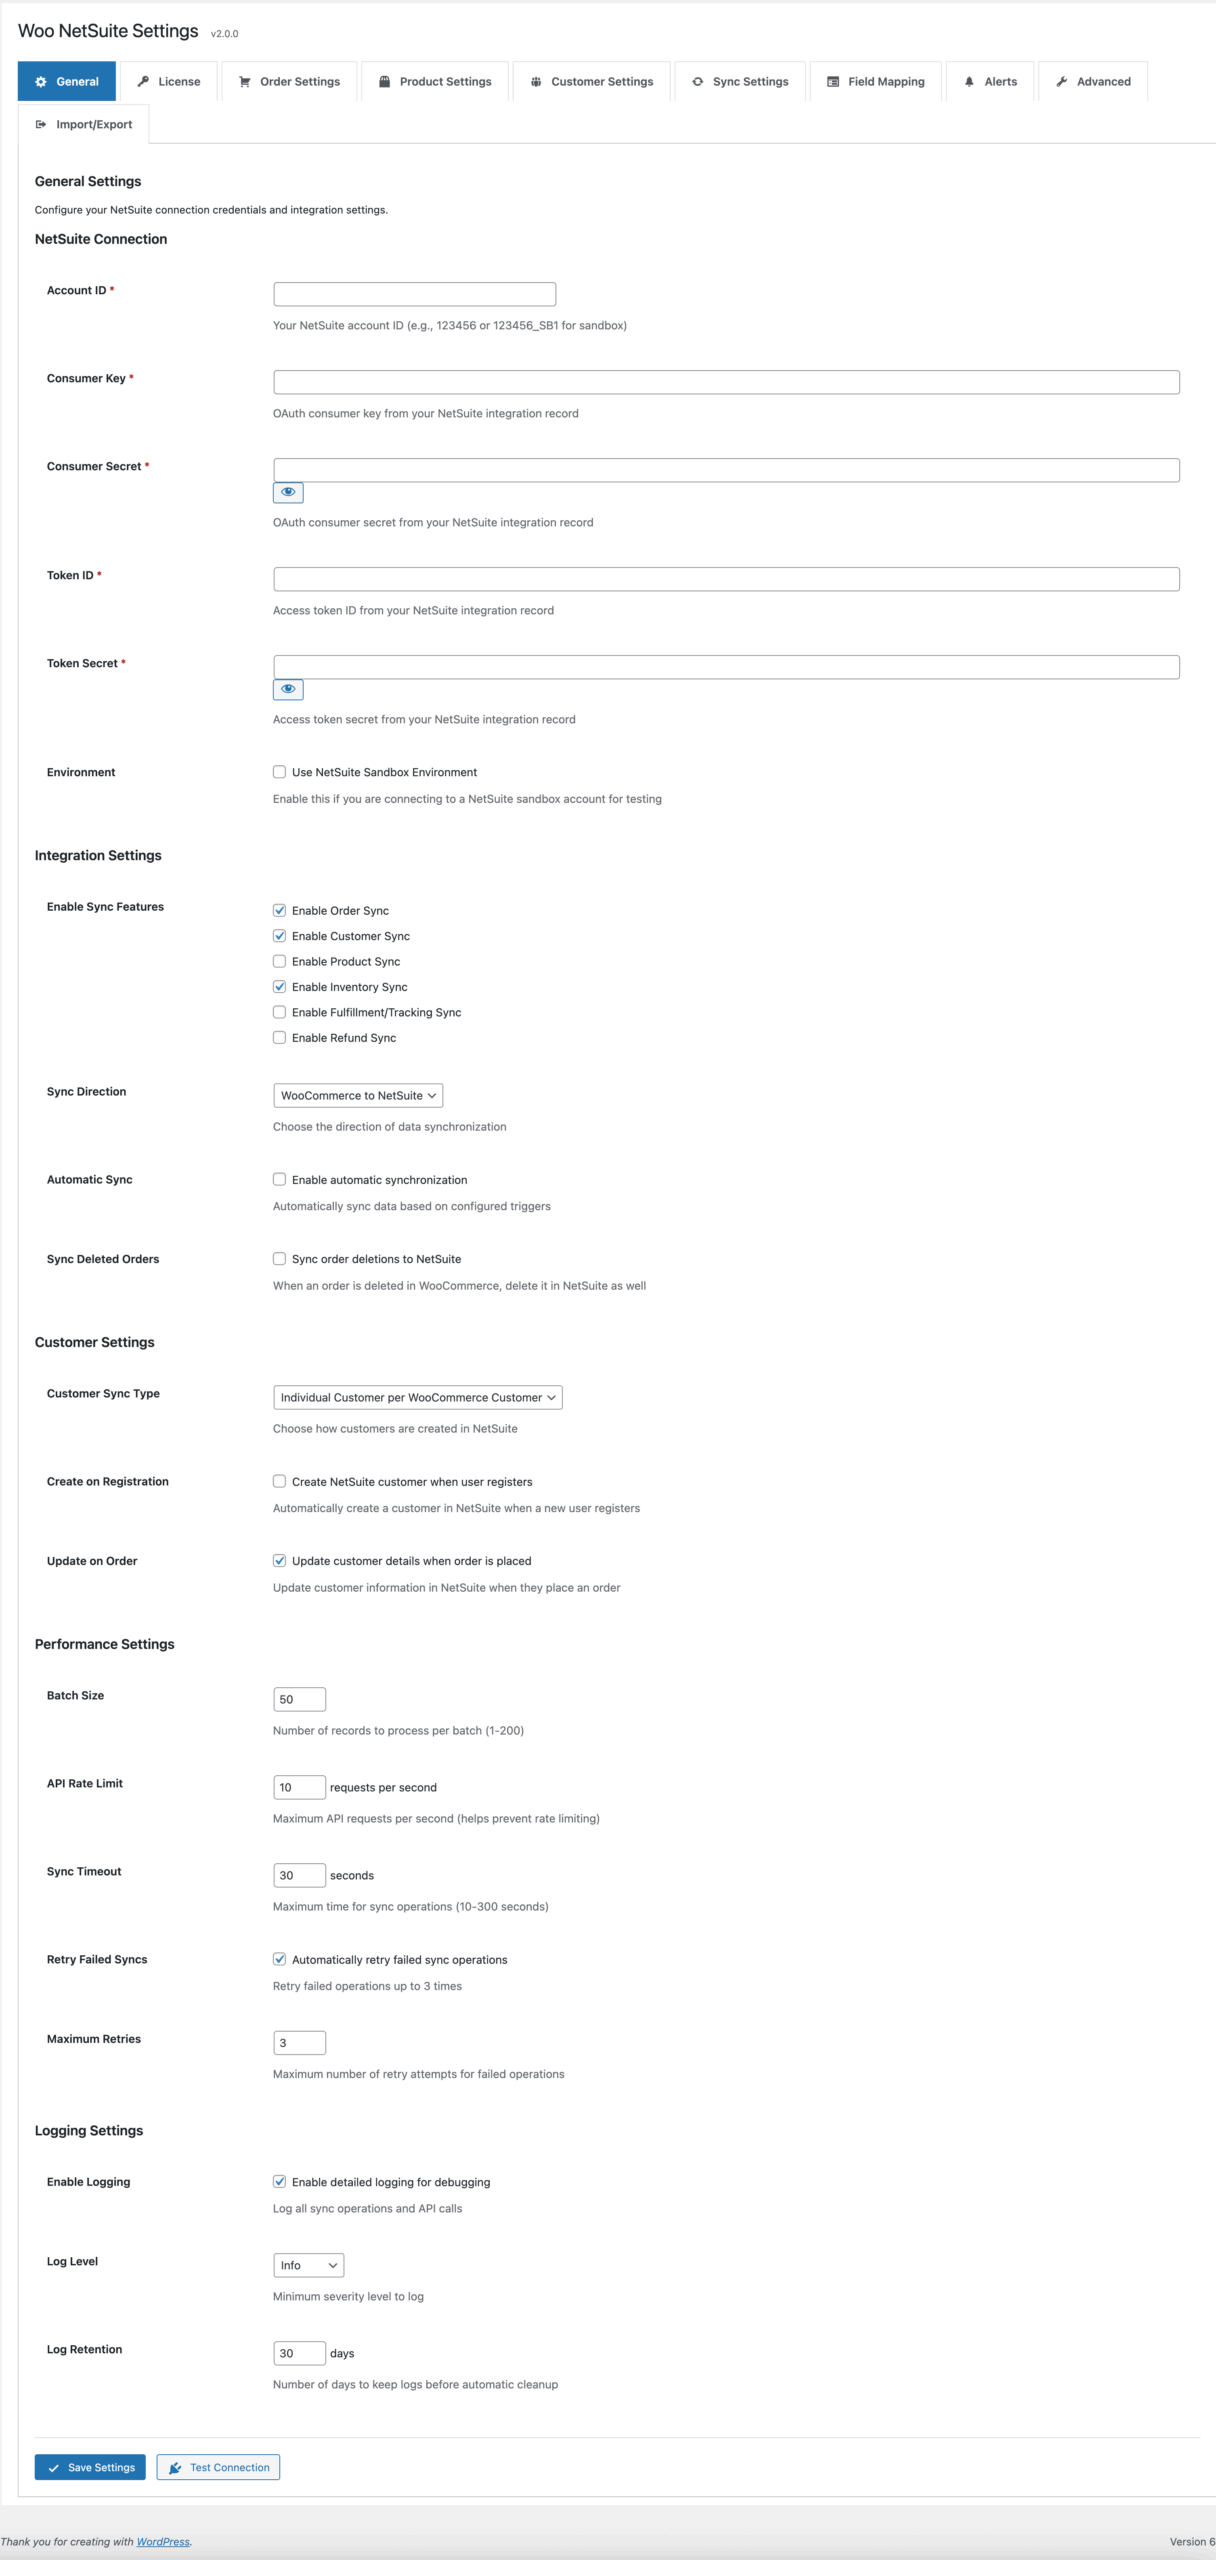
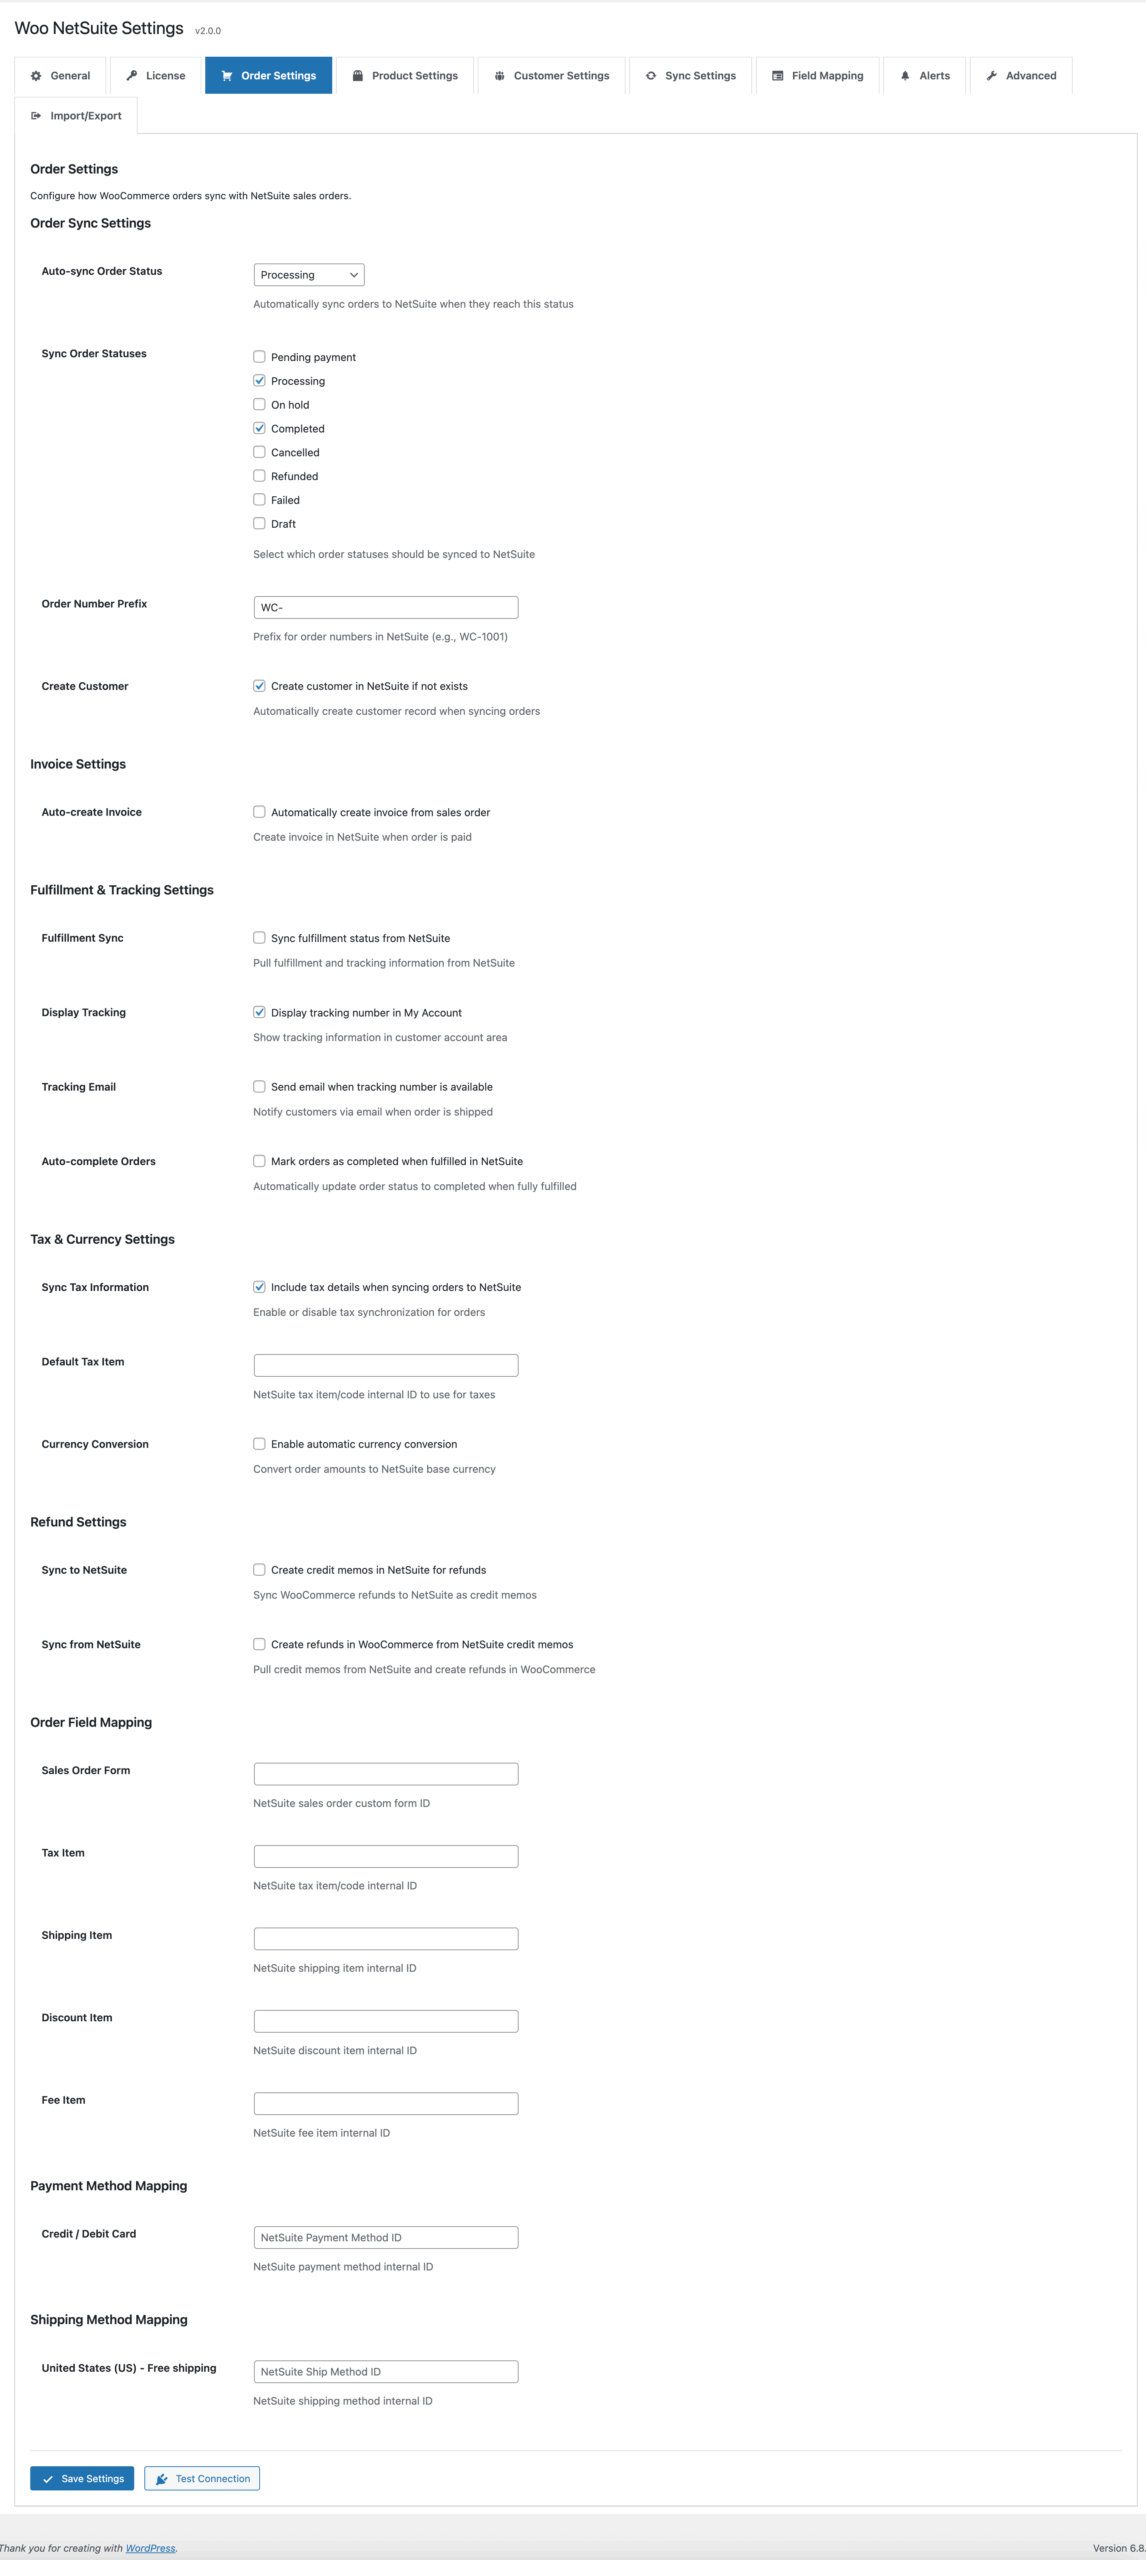
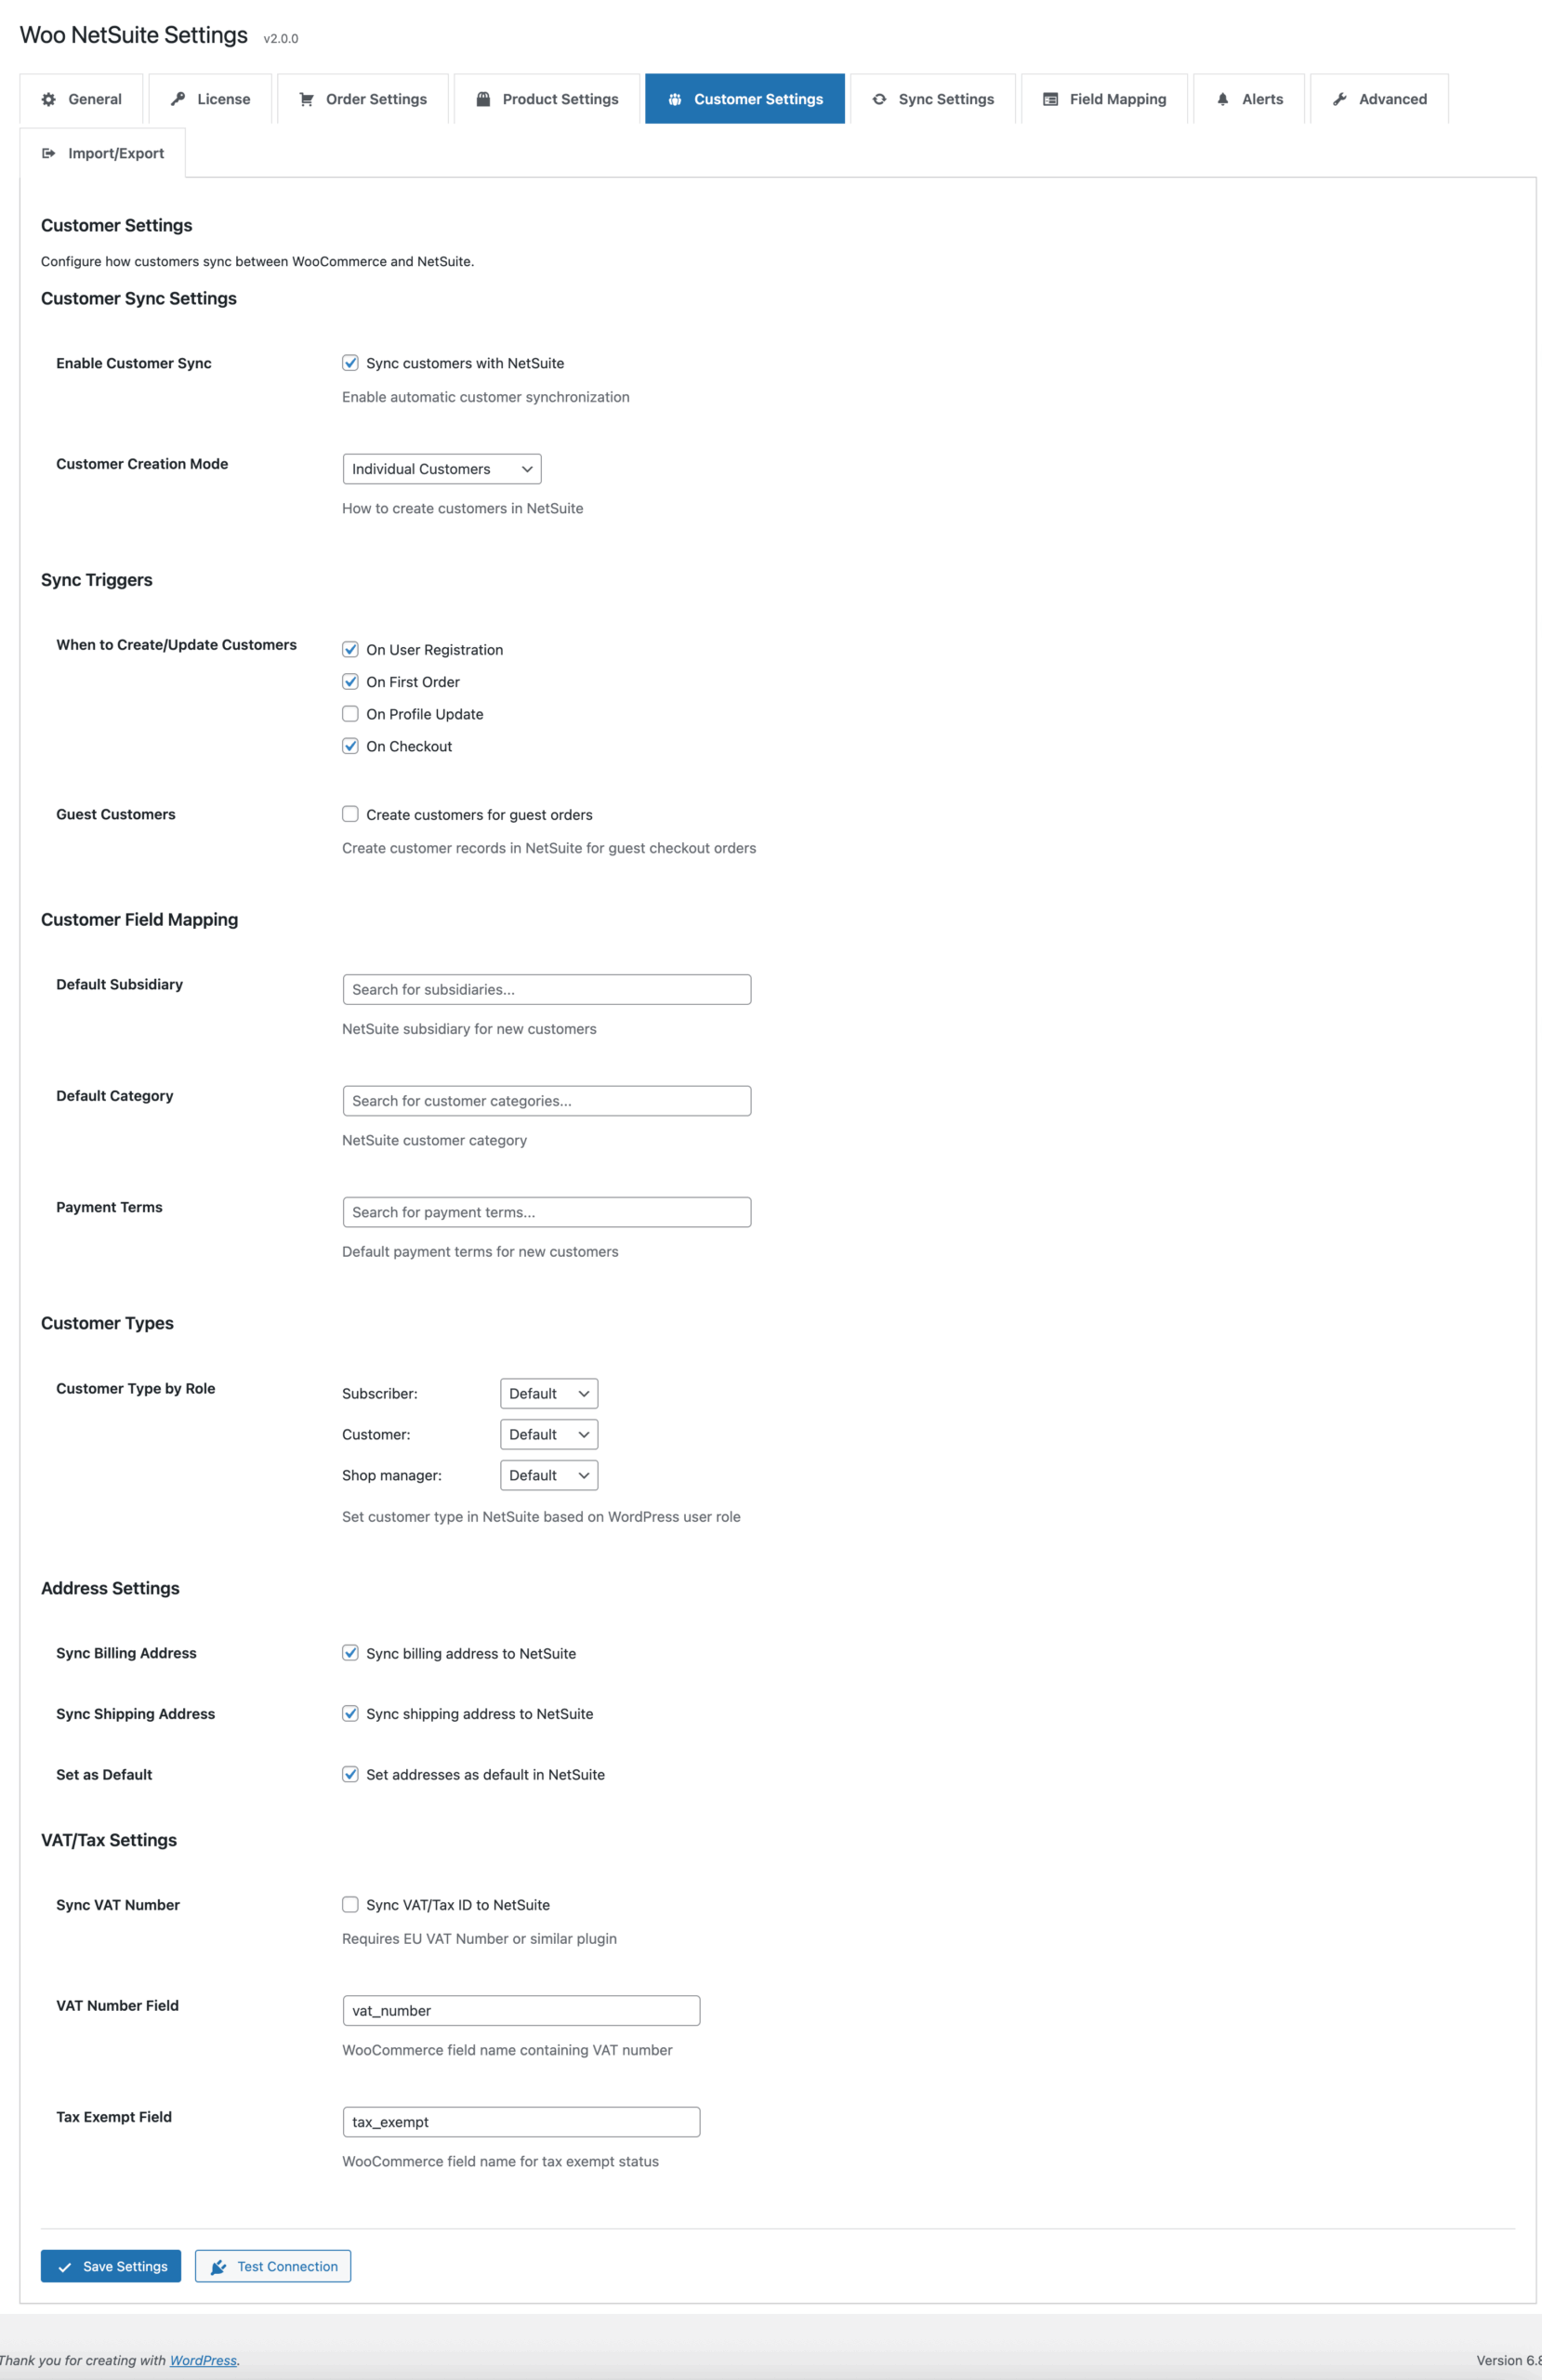
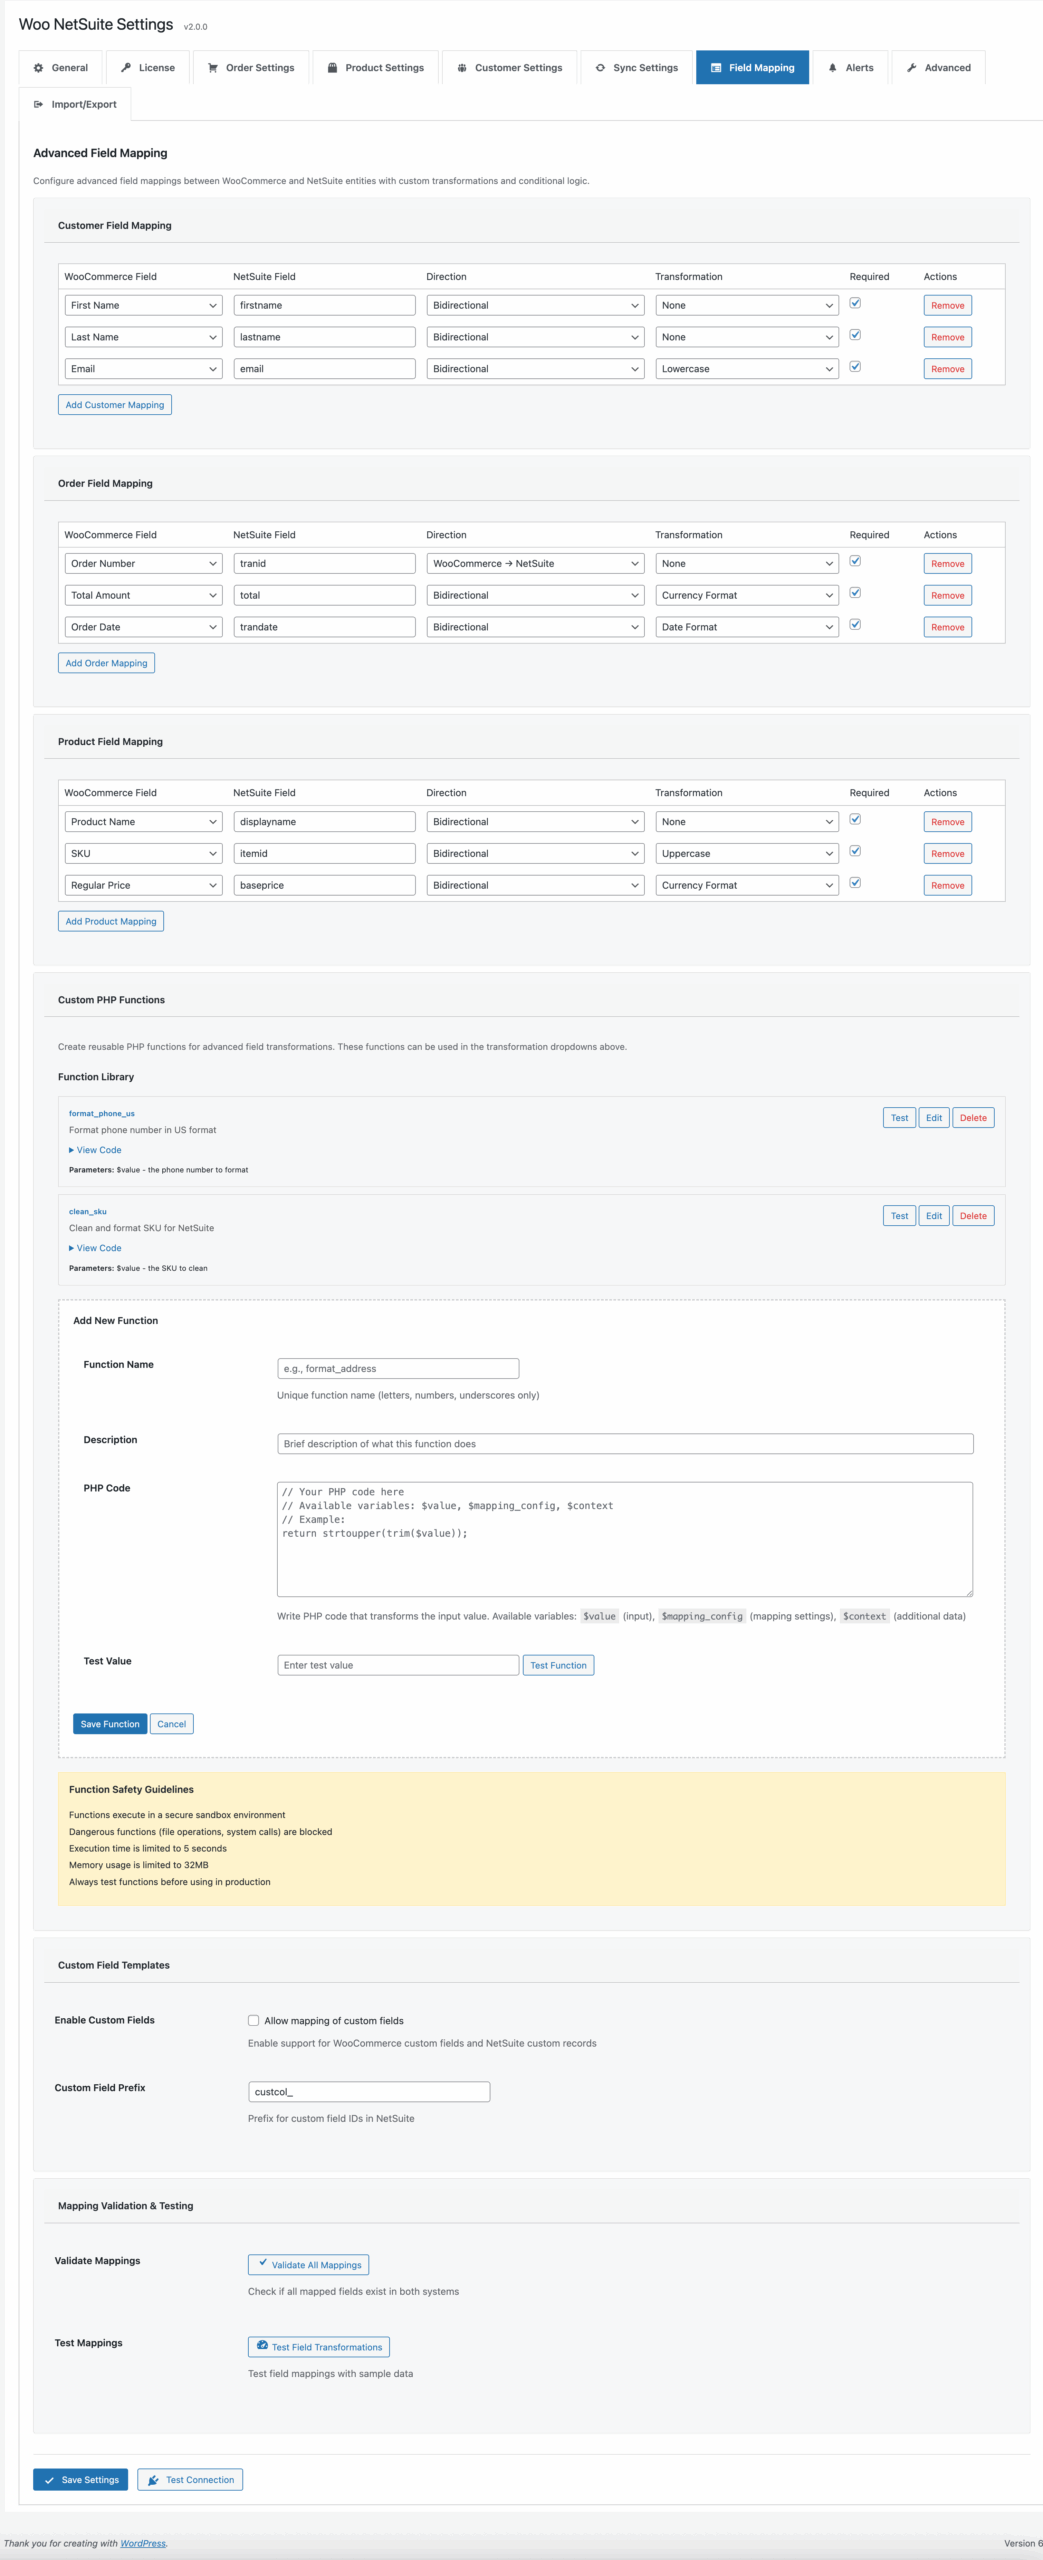
Plugin Screenshots & Interface Overview
Here’s a visual tour of the plugin’s powerful features and intuitive interface:
General Settings – Configure your NetSuite connection
Order Settings – Control order synchronization
Customer Settings – Manage customer data sync
Product Settings – Configure product sync

Field Mapping – Visual field mapping interface
Sync Settings – Configure sync schedules
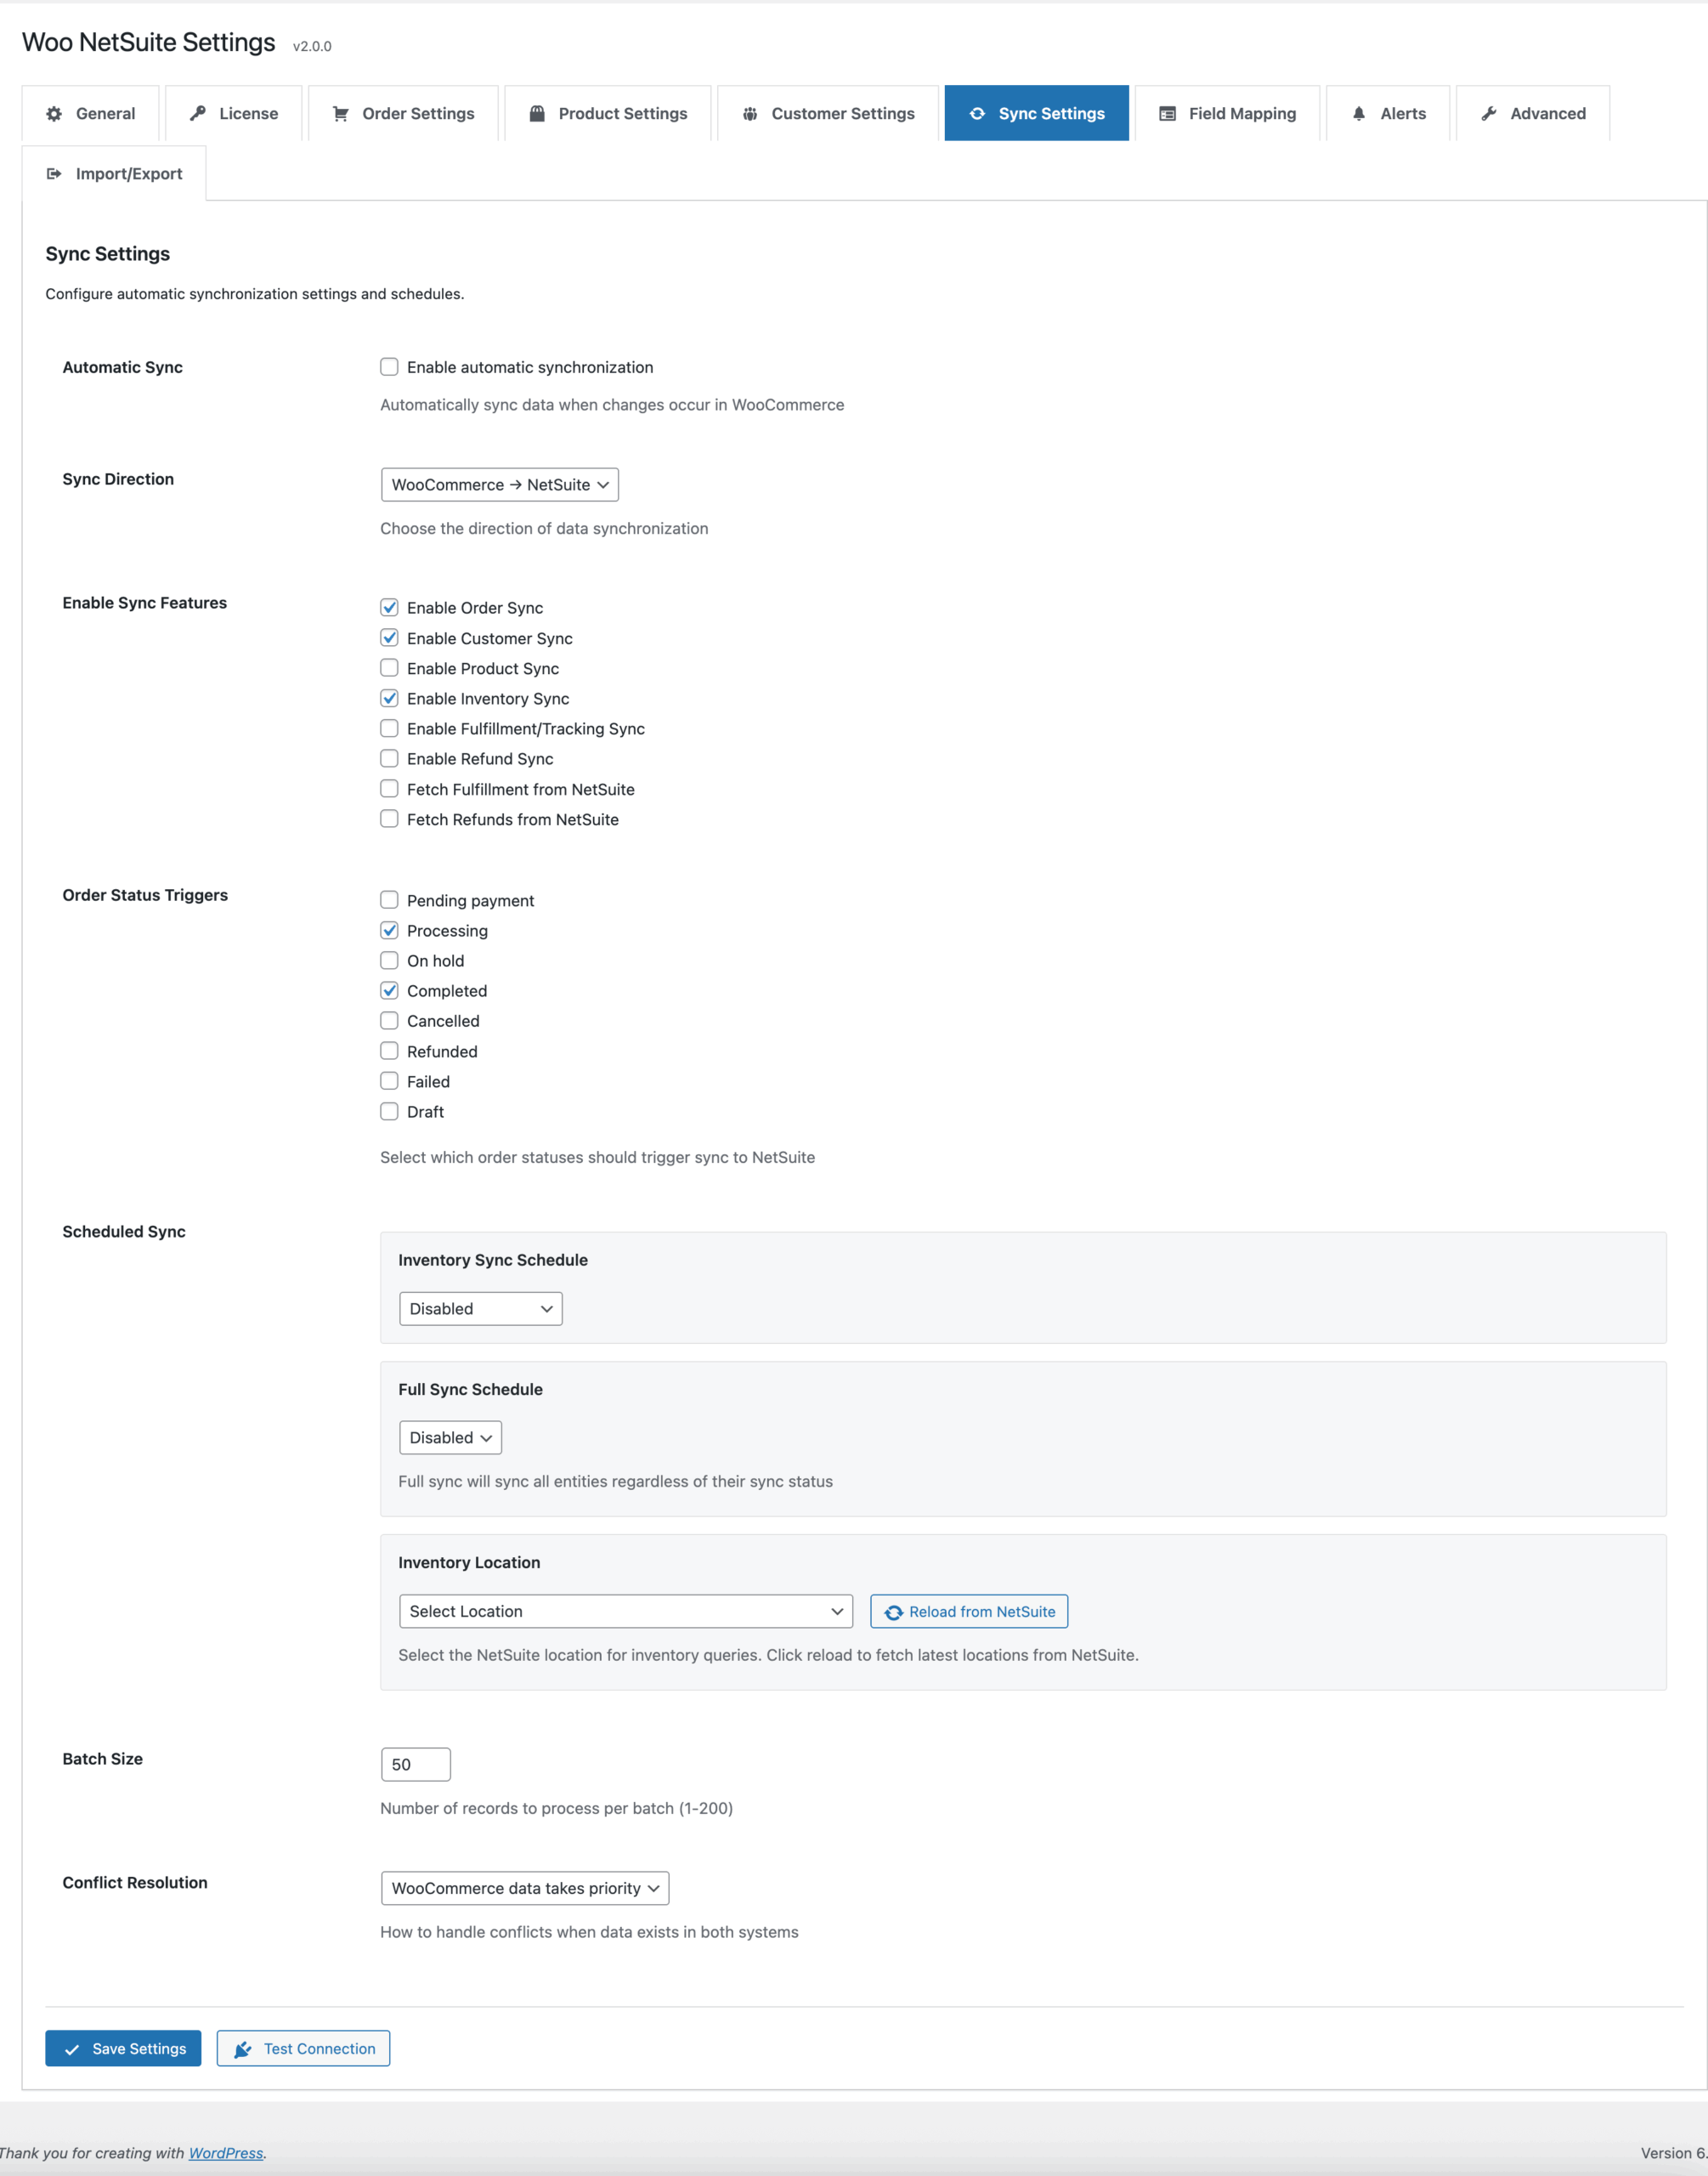
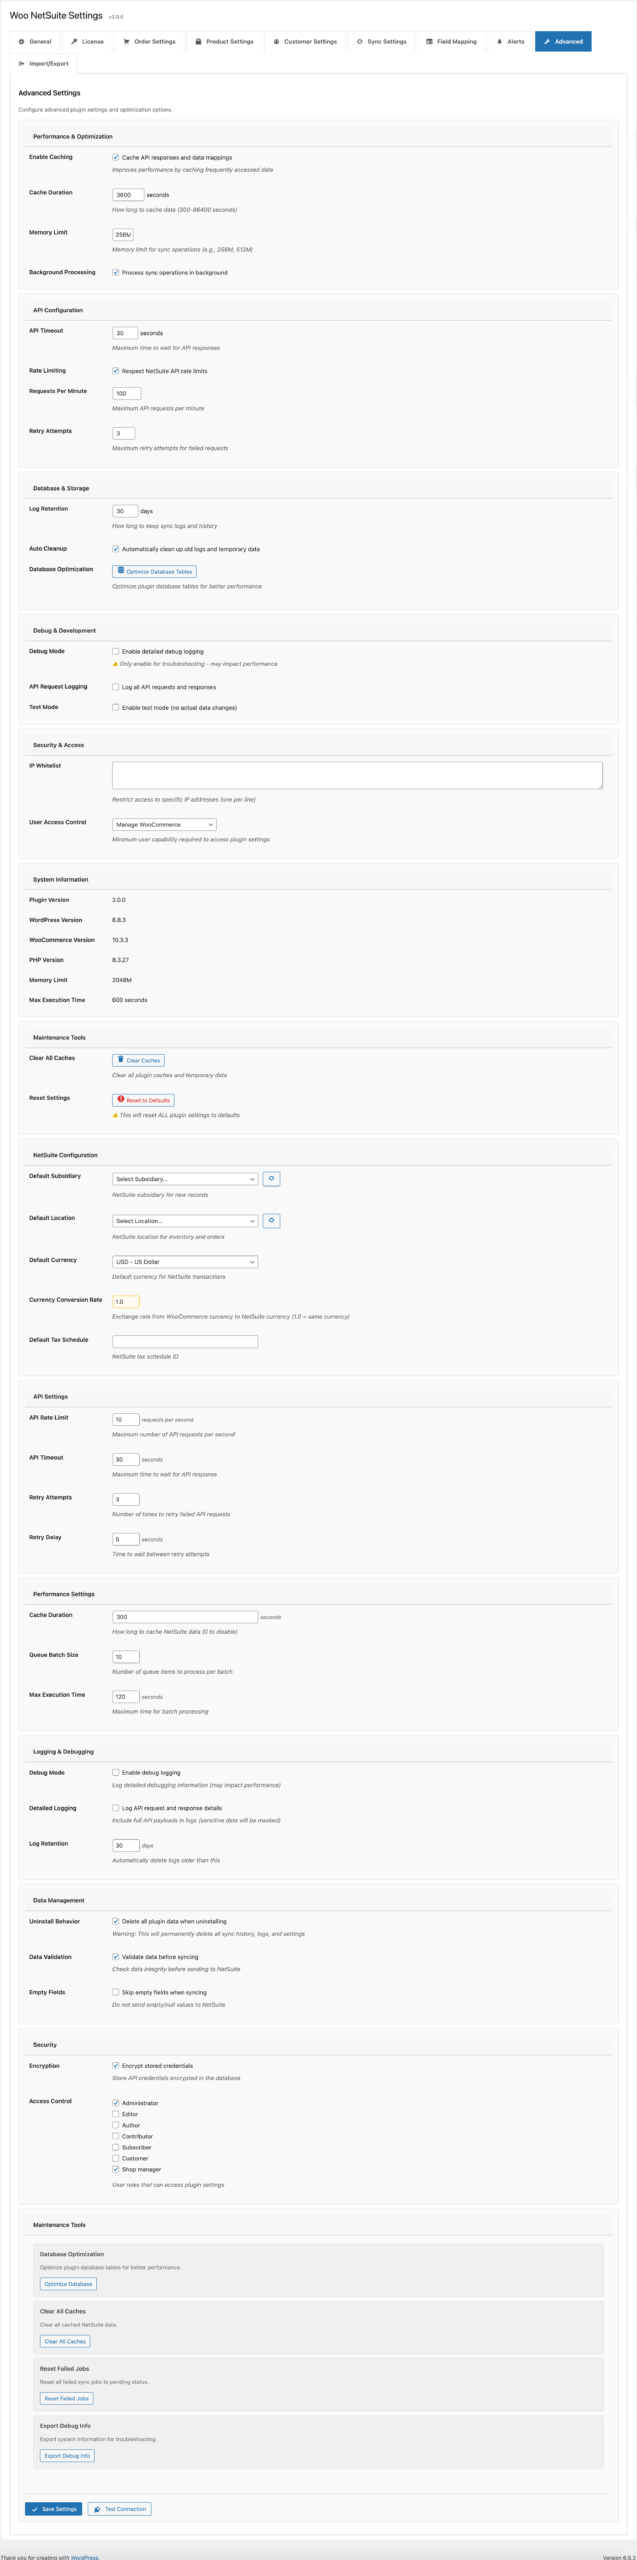
Advanced Settings – Fine-tune advanced options
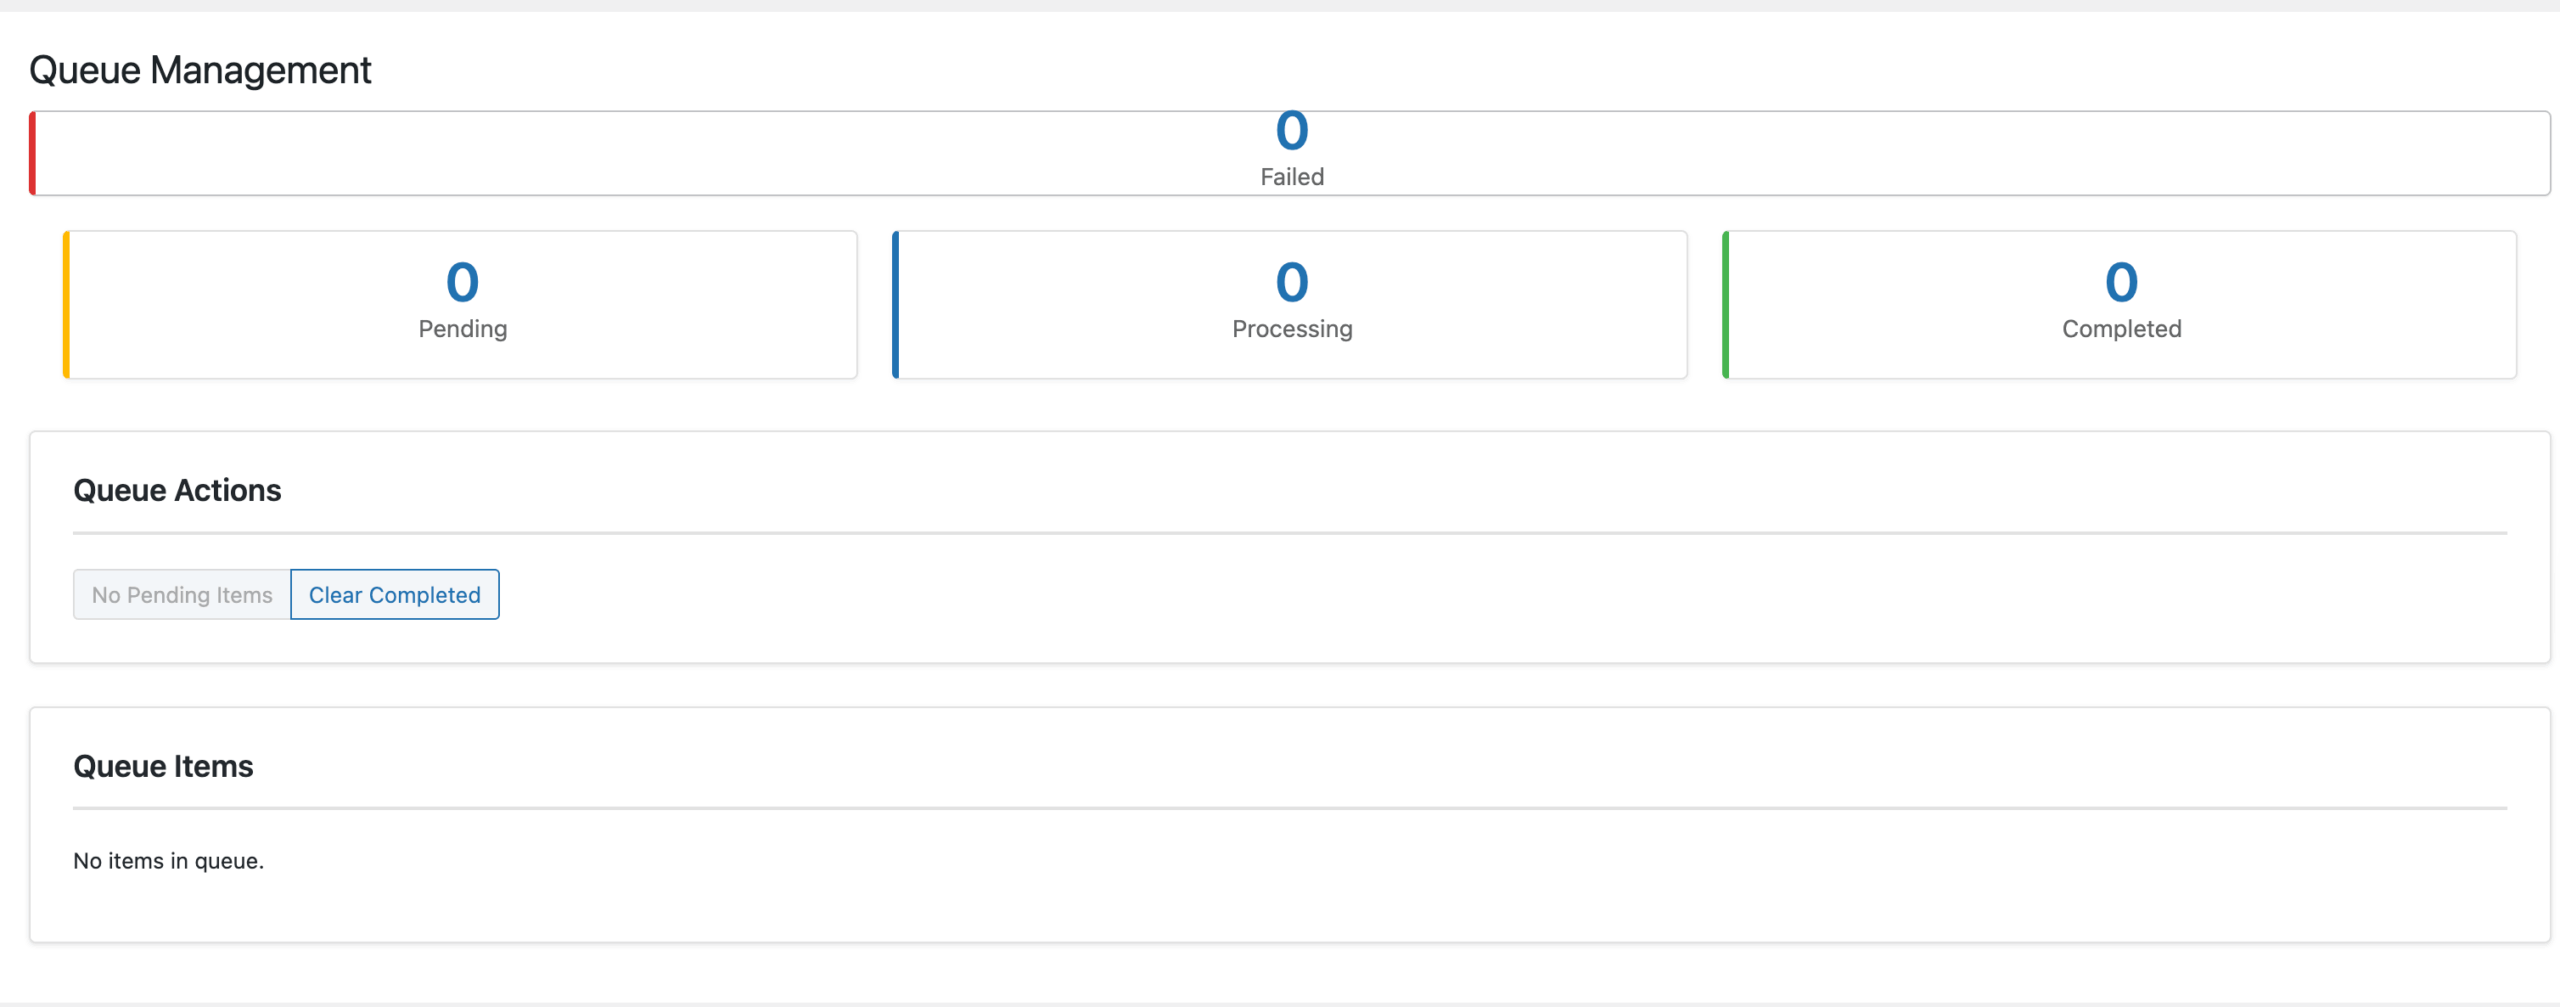
Queue Status – Monitor sync queue
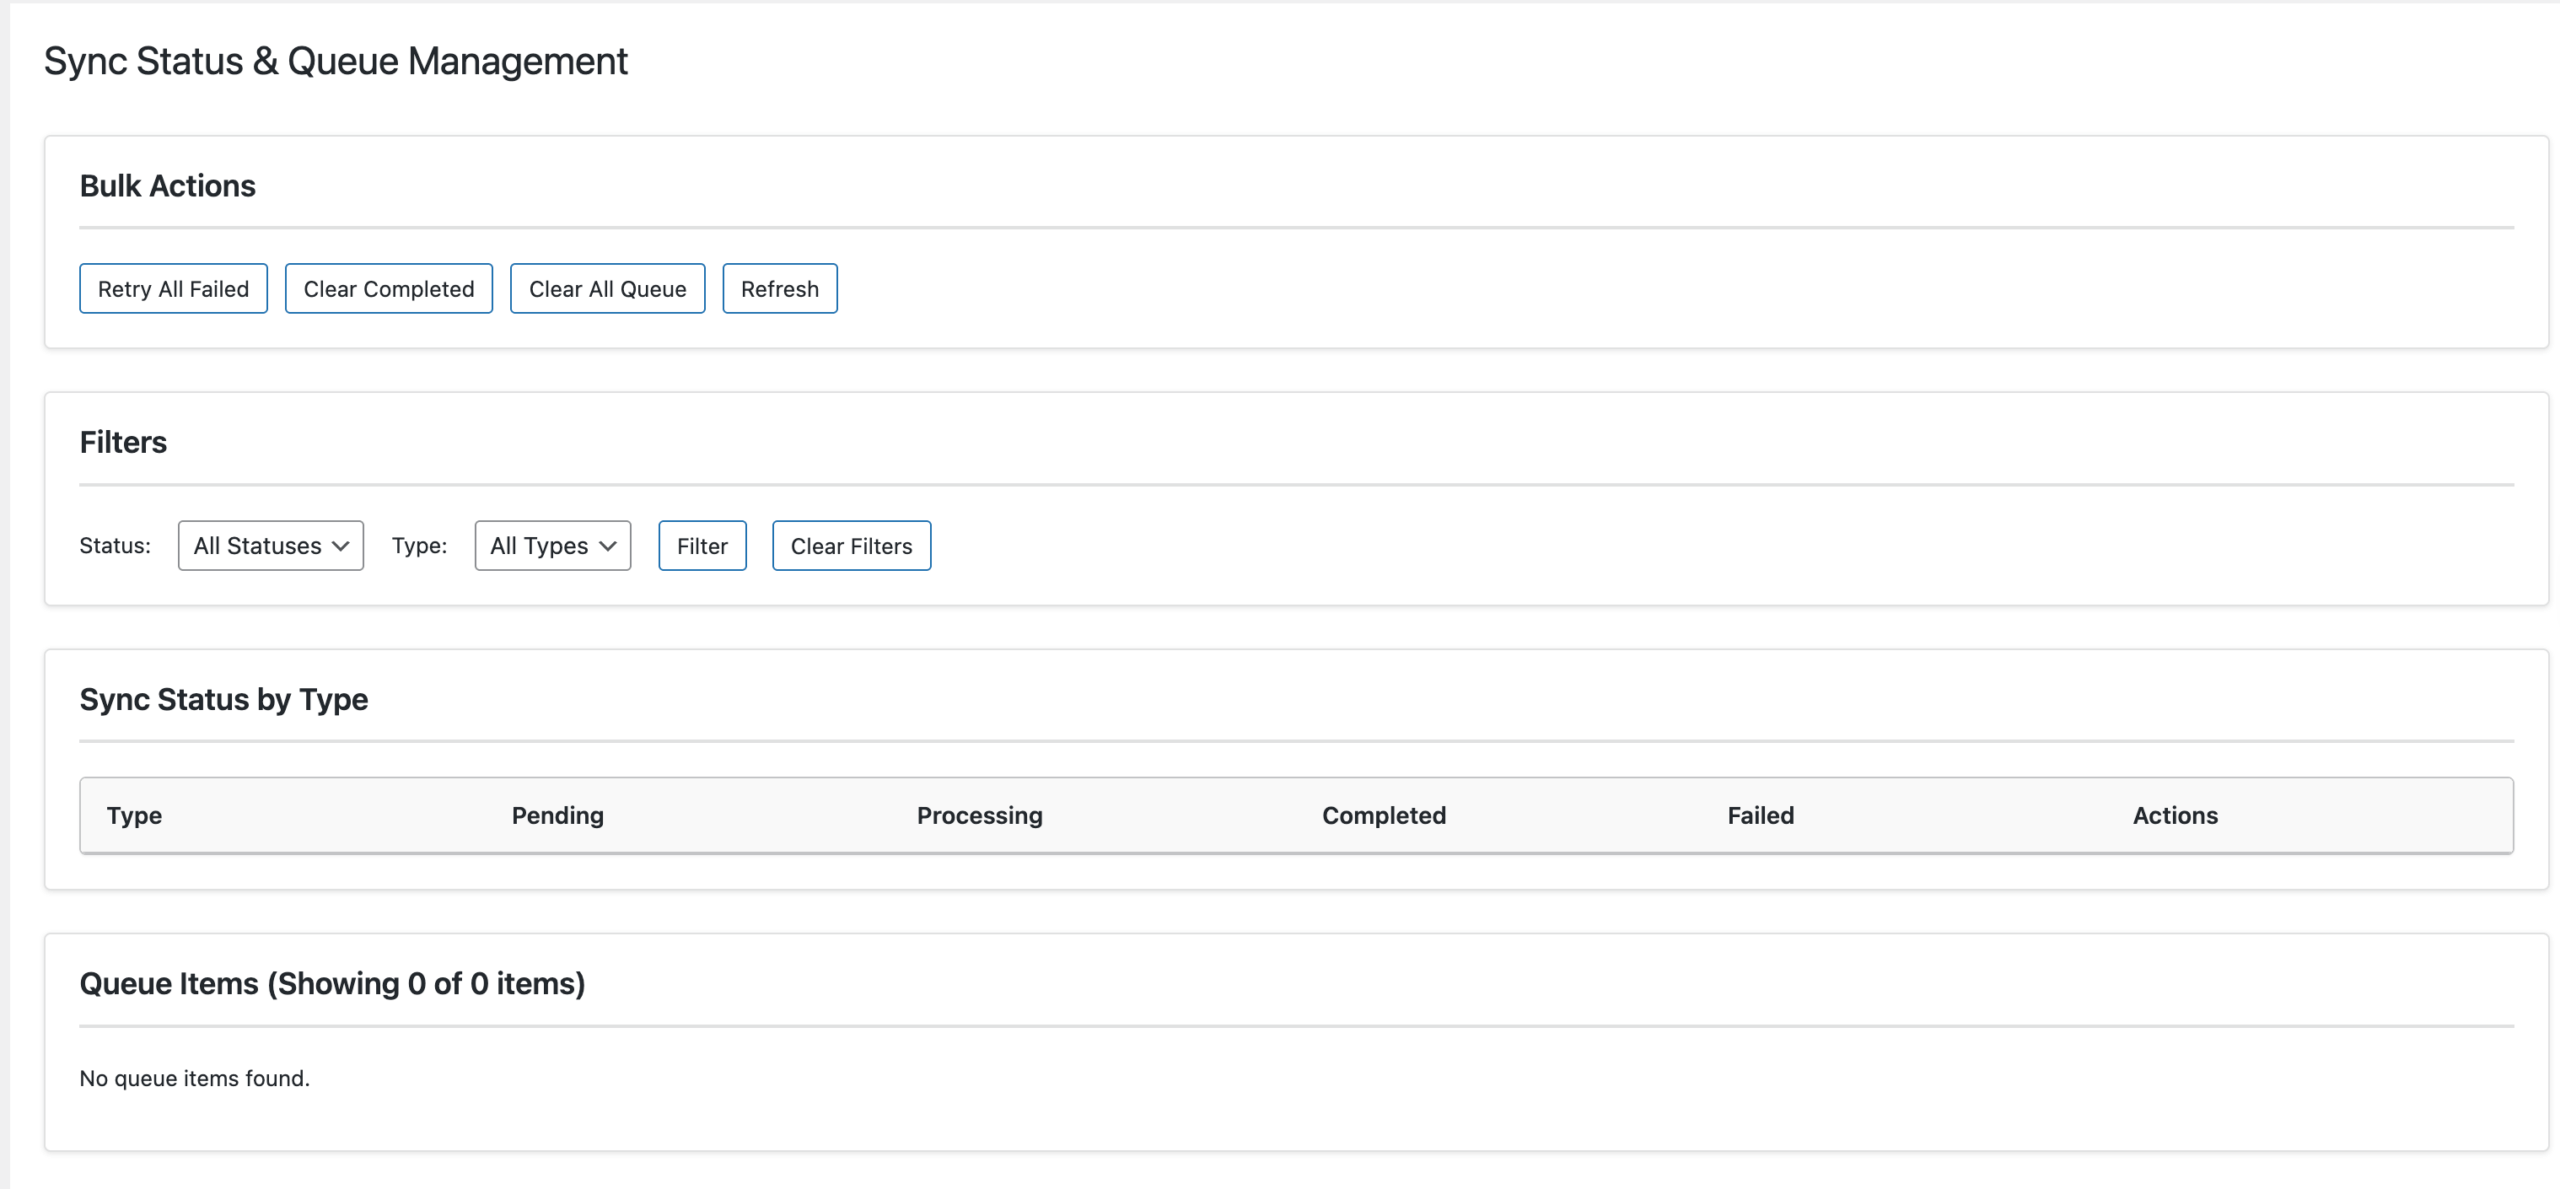
Sync Status – View sync history
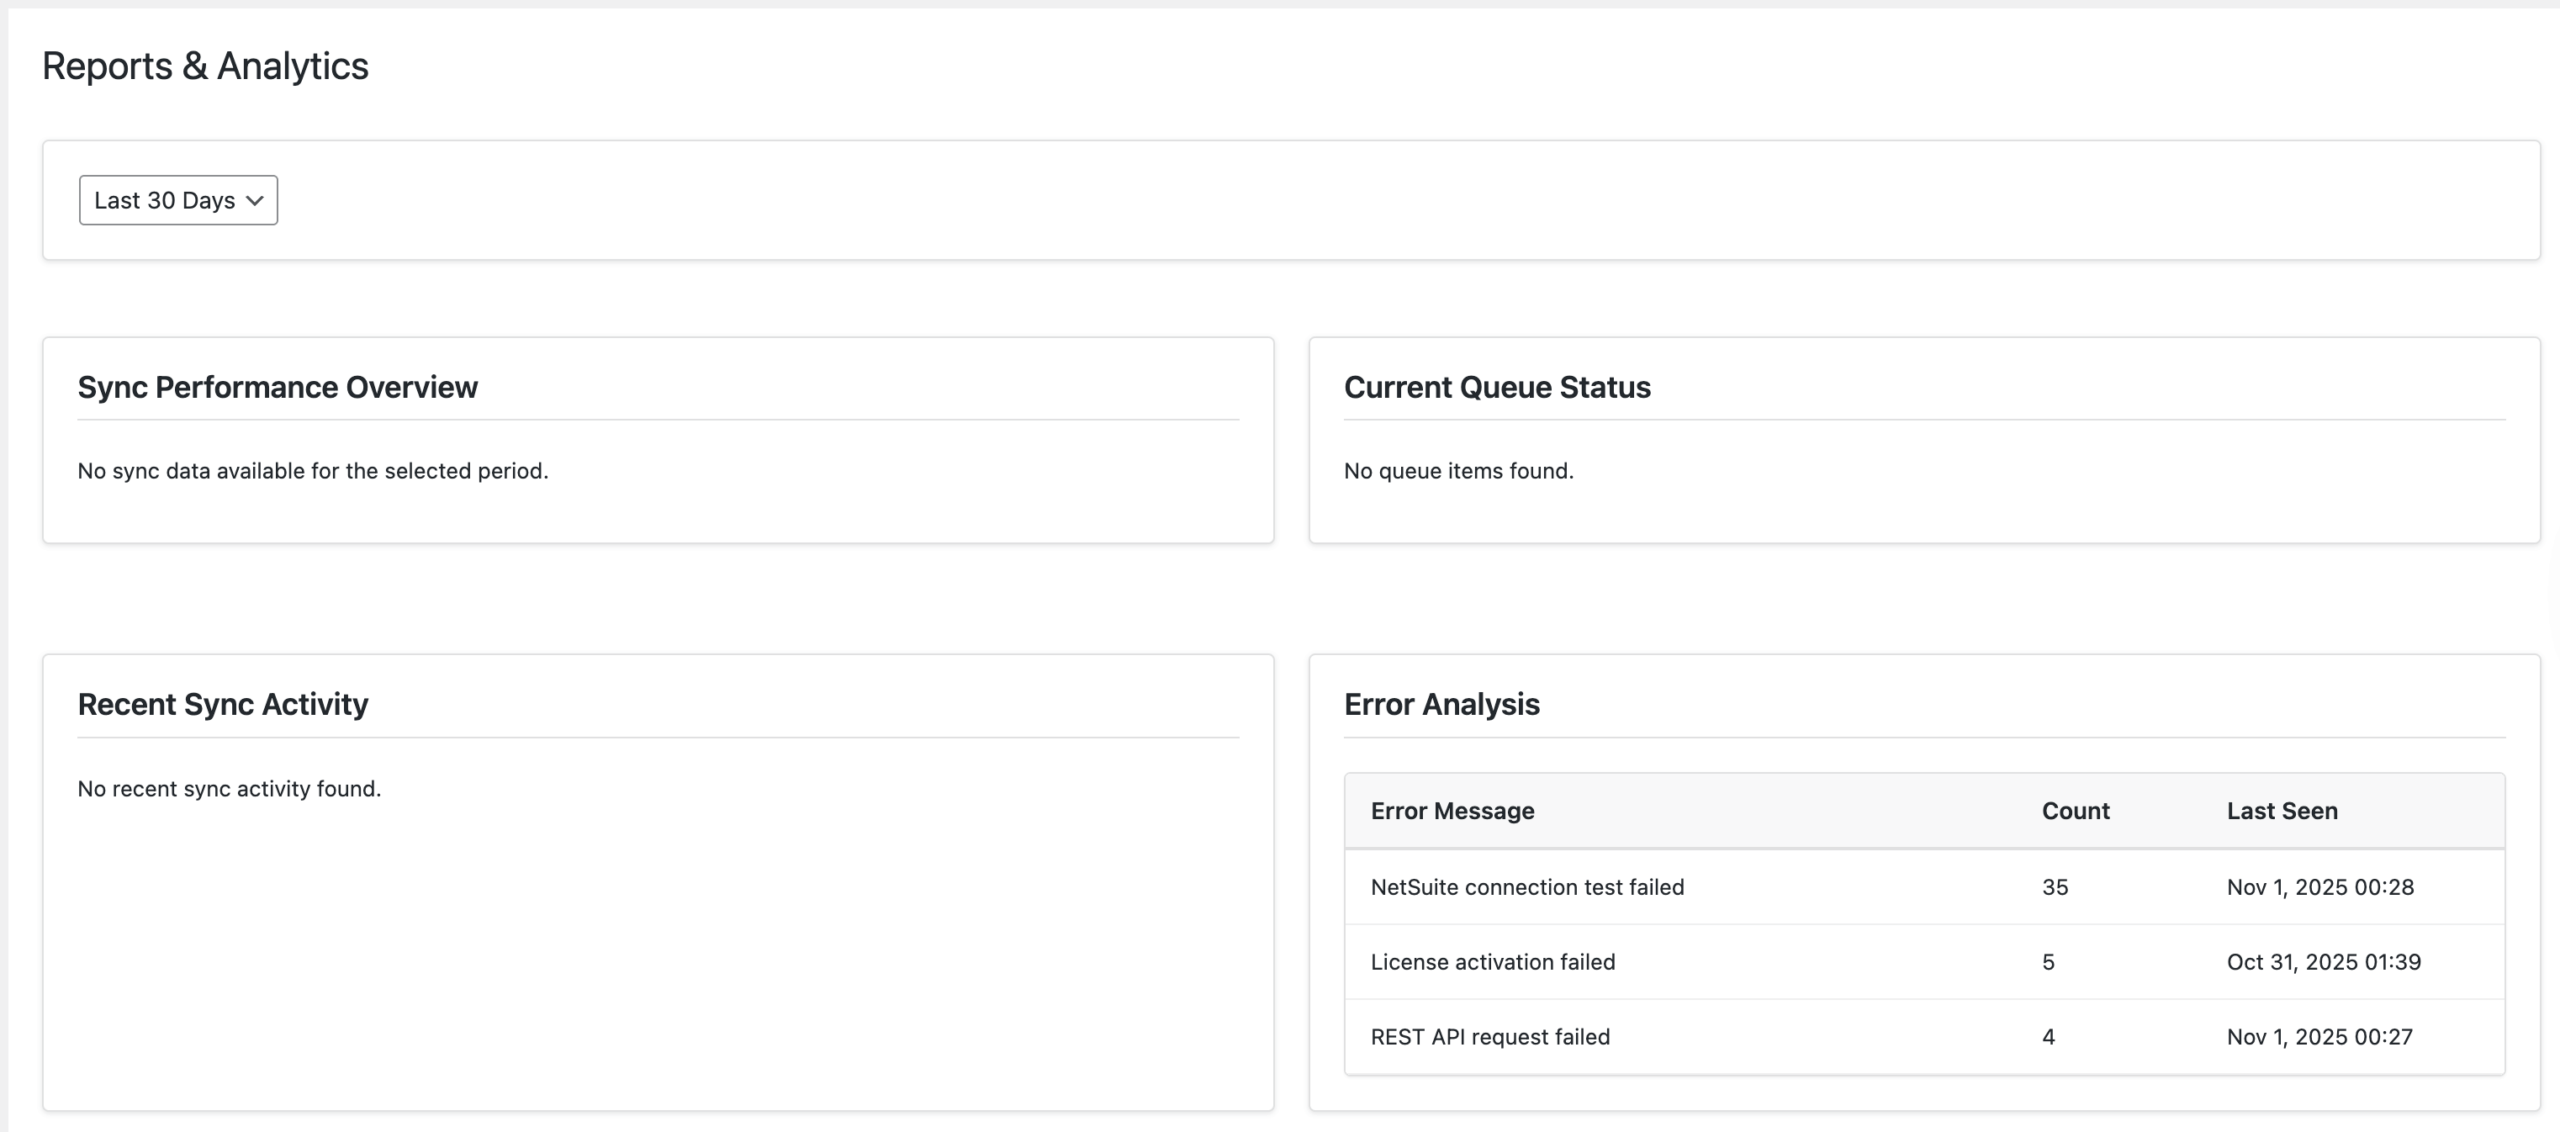
Reports – Analytics and metrics
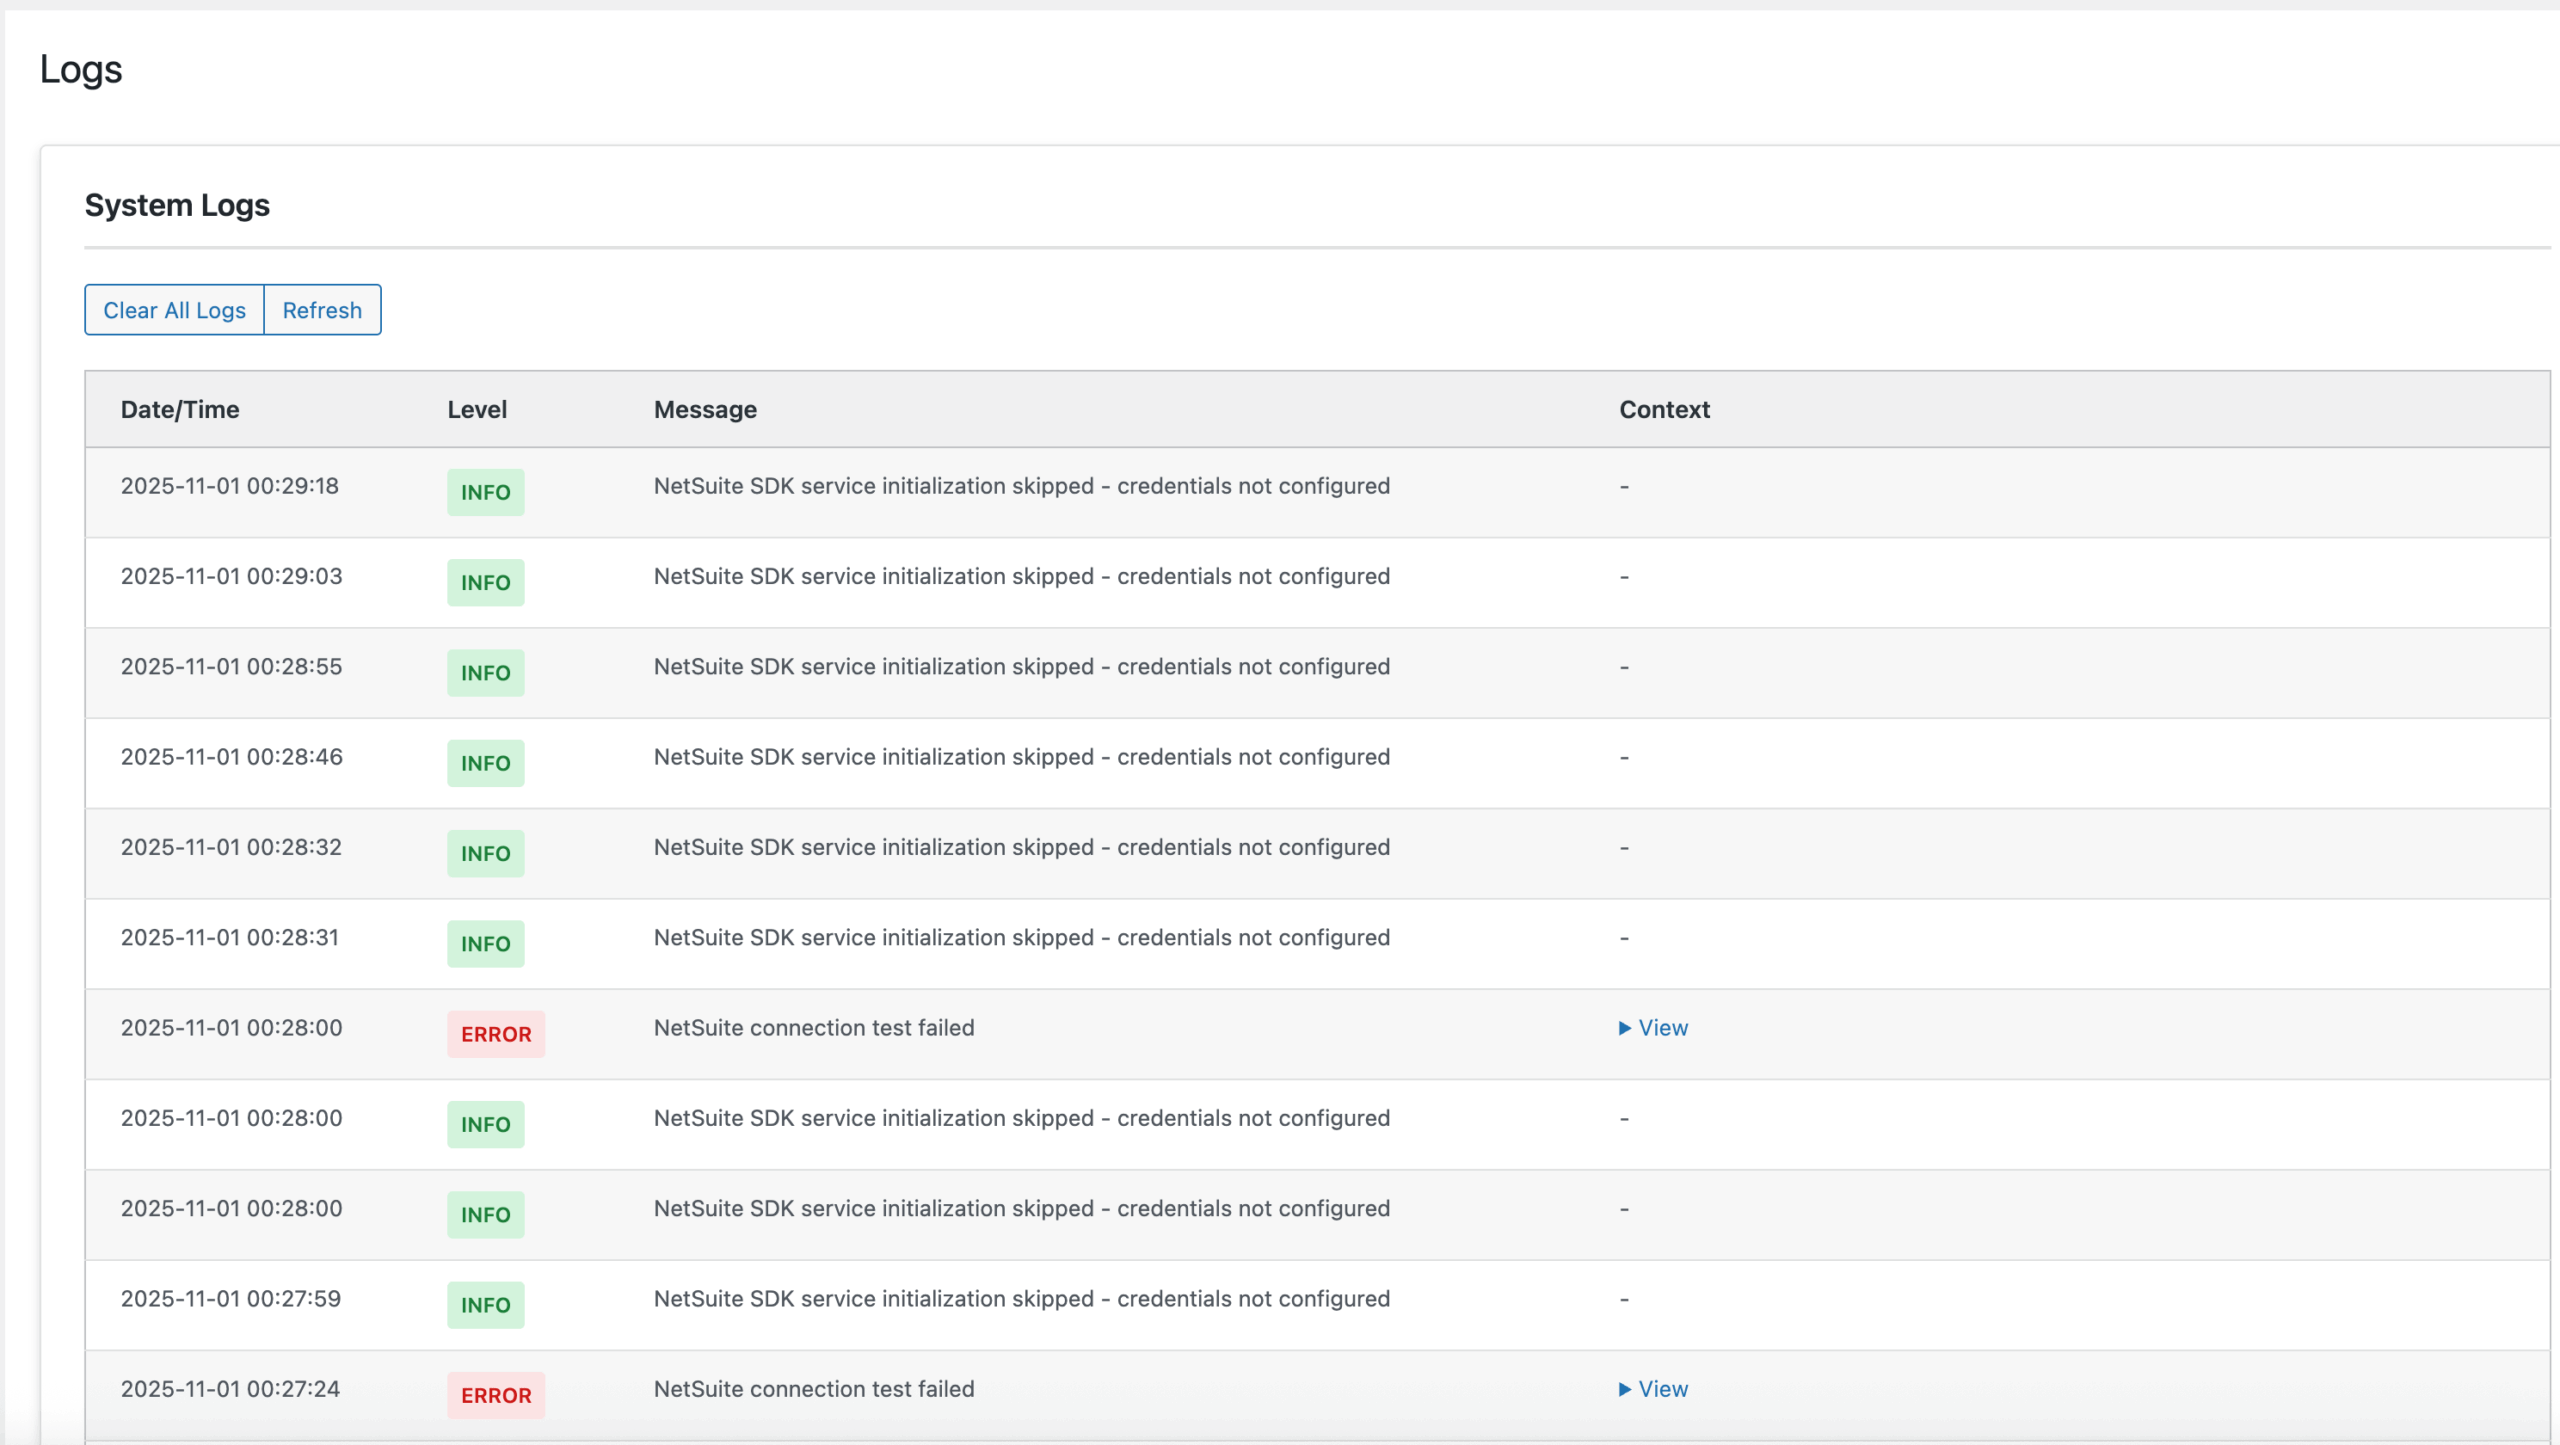
Logs – Debugging and troubleshooting
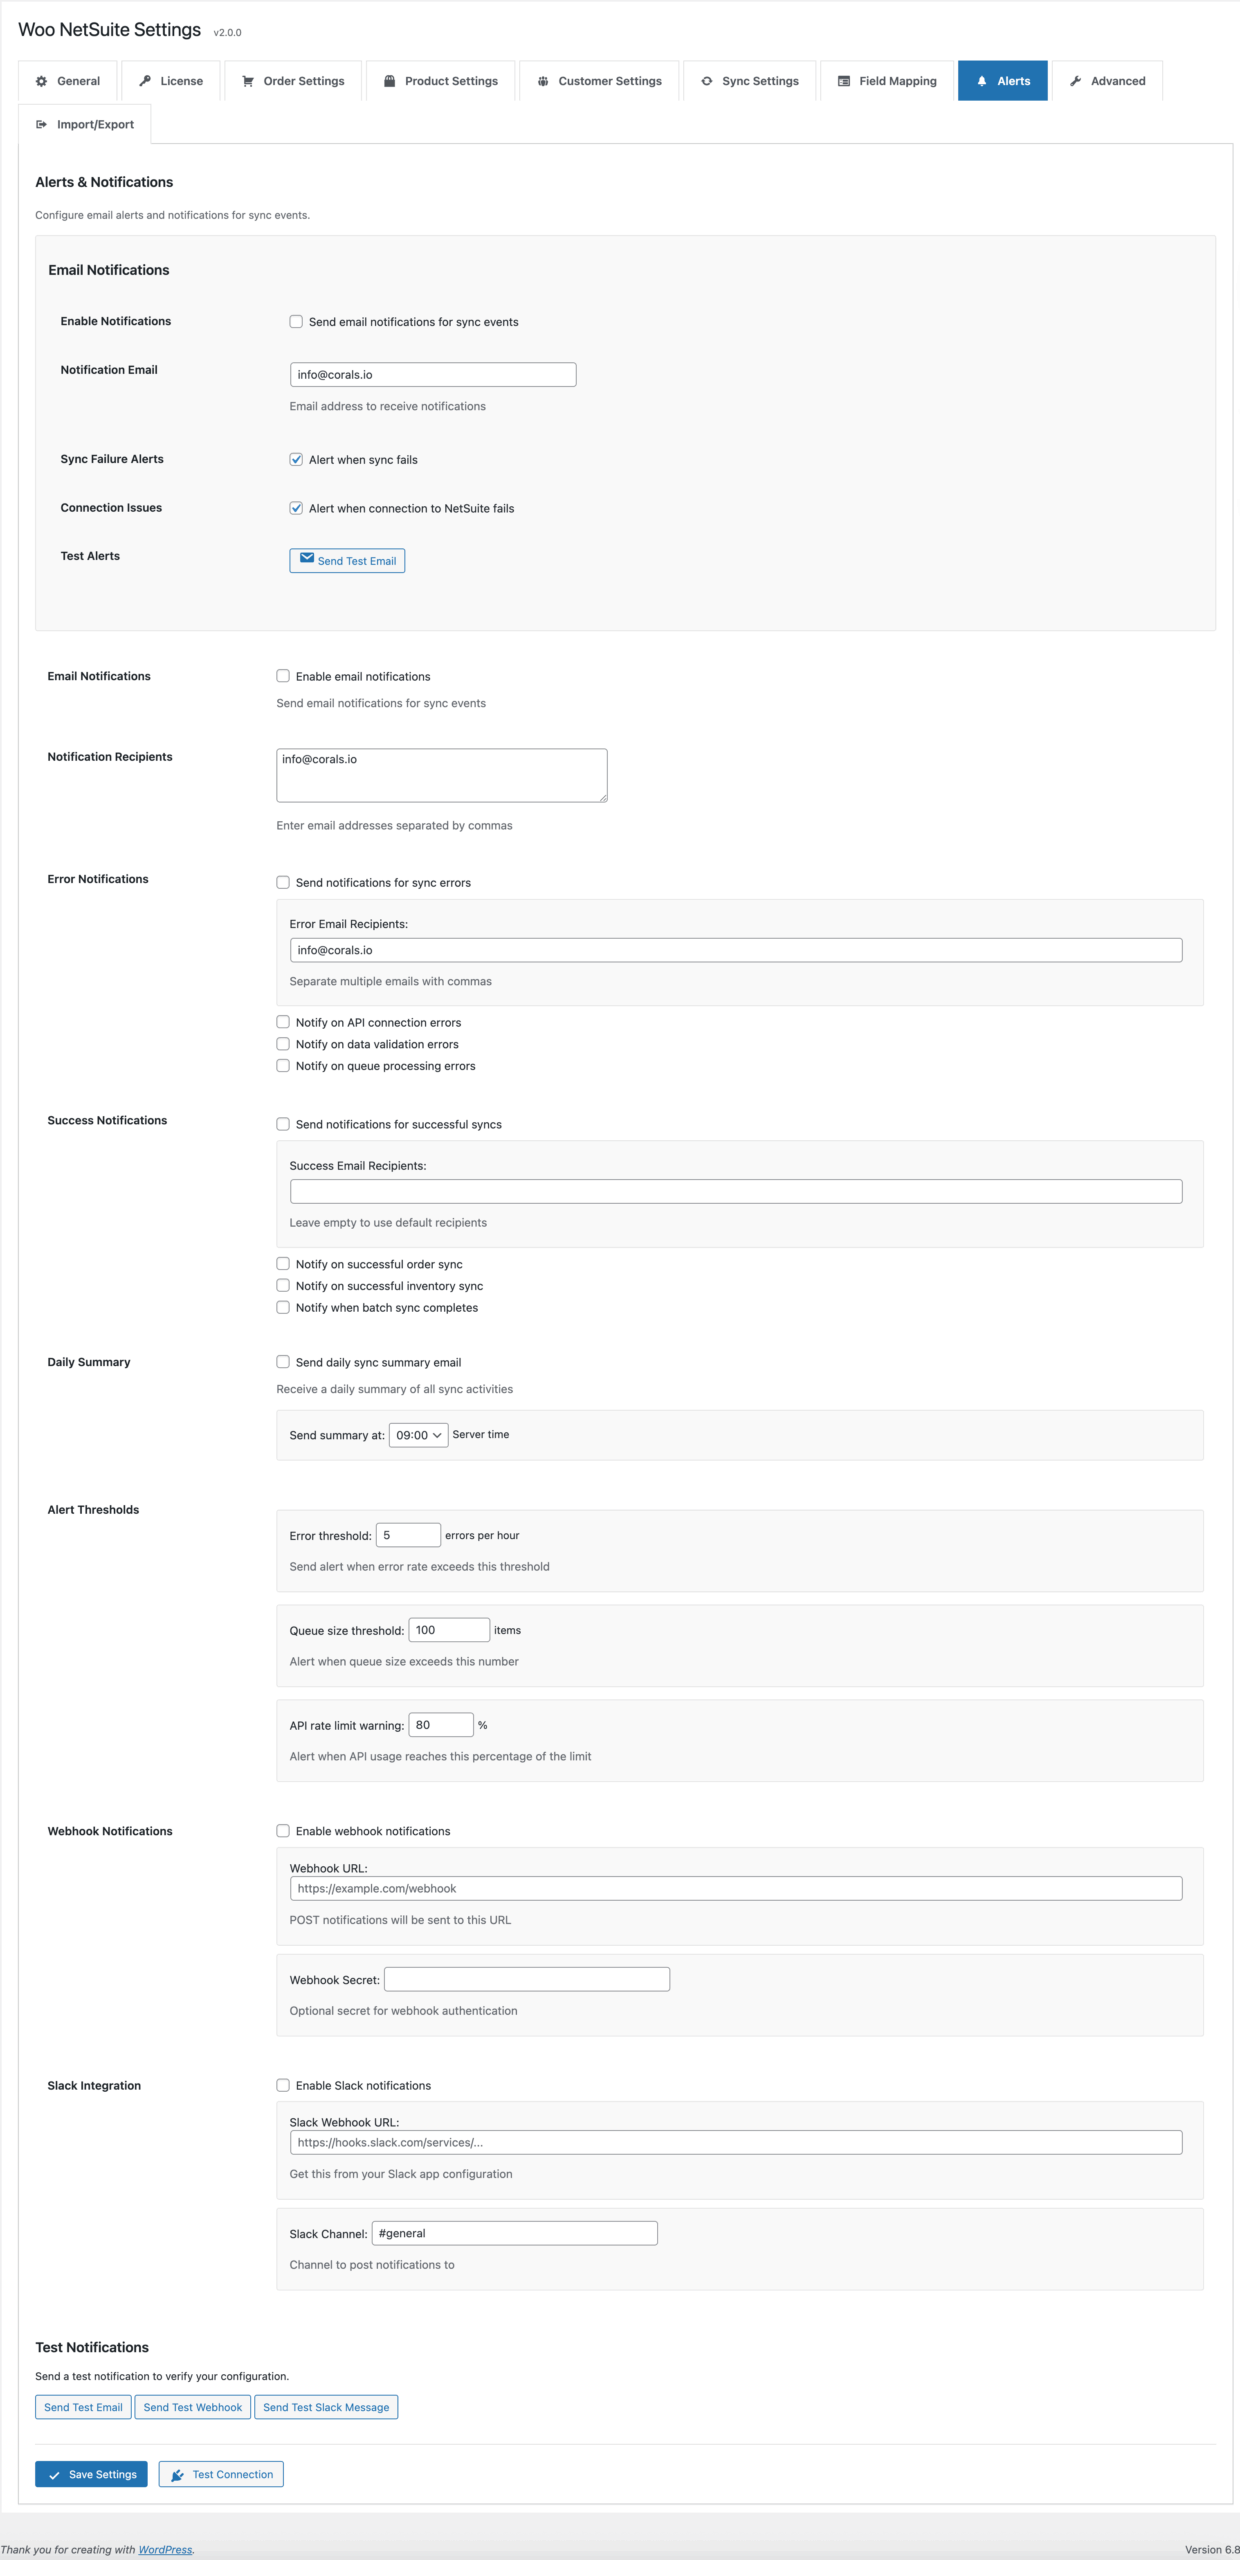
Alerts – Configure notifications
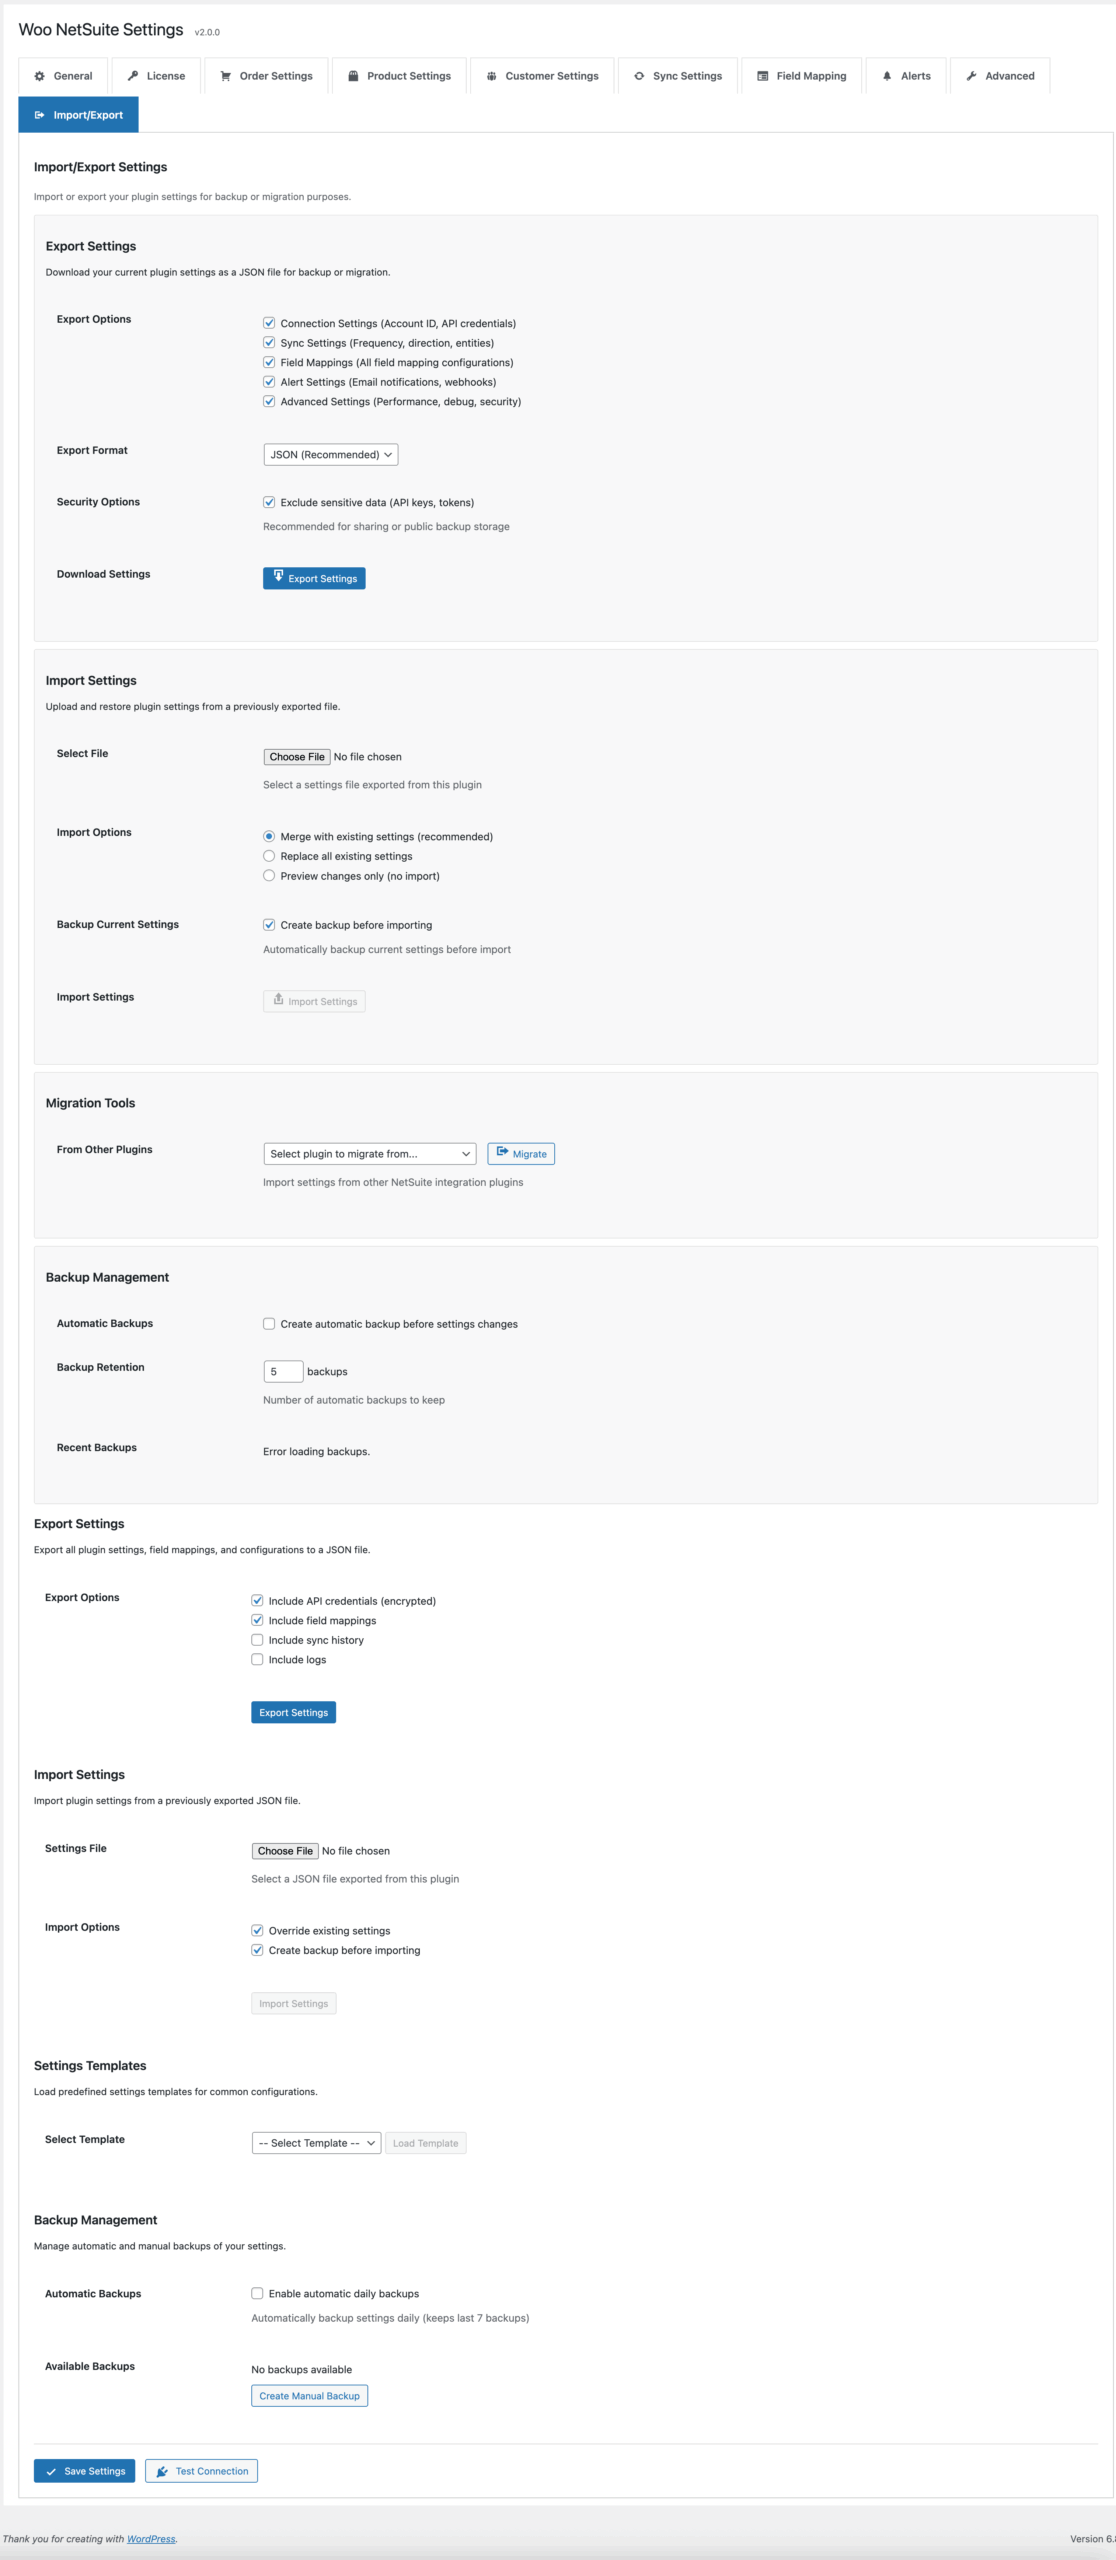
Export/Import – Backup settings
Leave a Reply